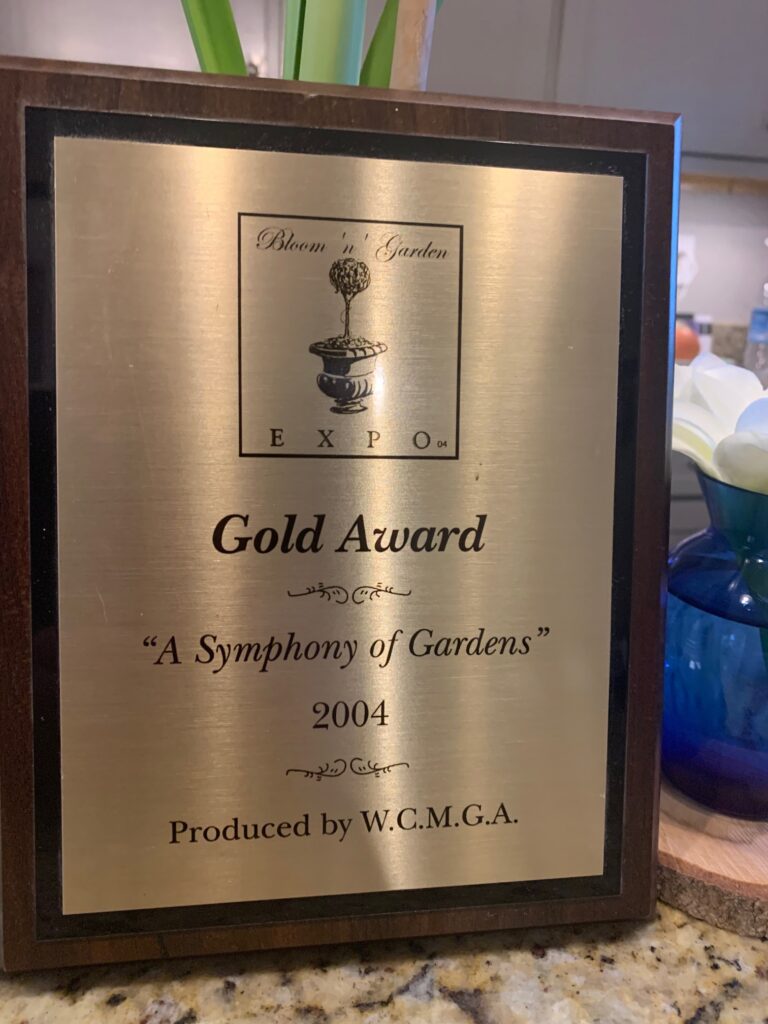
Powers Landscaping wins Gold Award for Best of Show at Bloom and Garden Williamson County Master Gardener Show
Project Brief
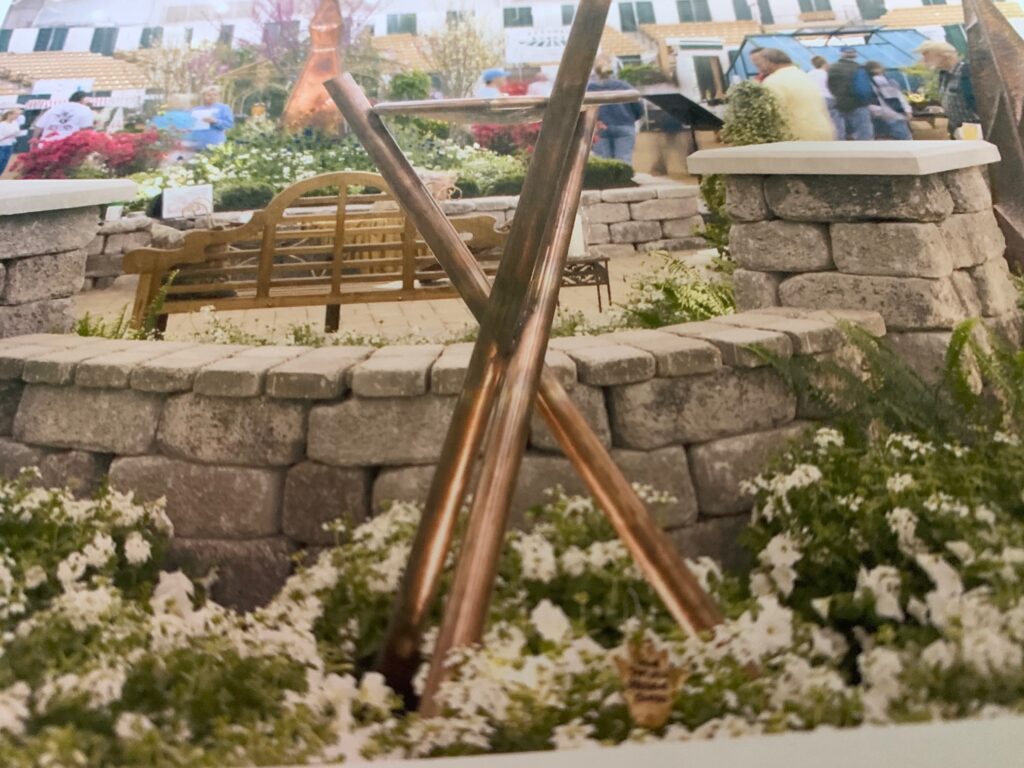
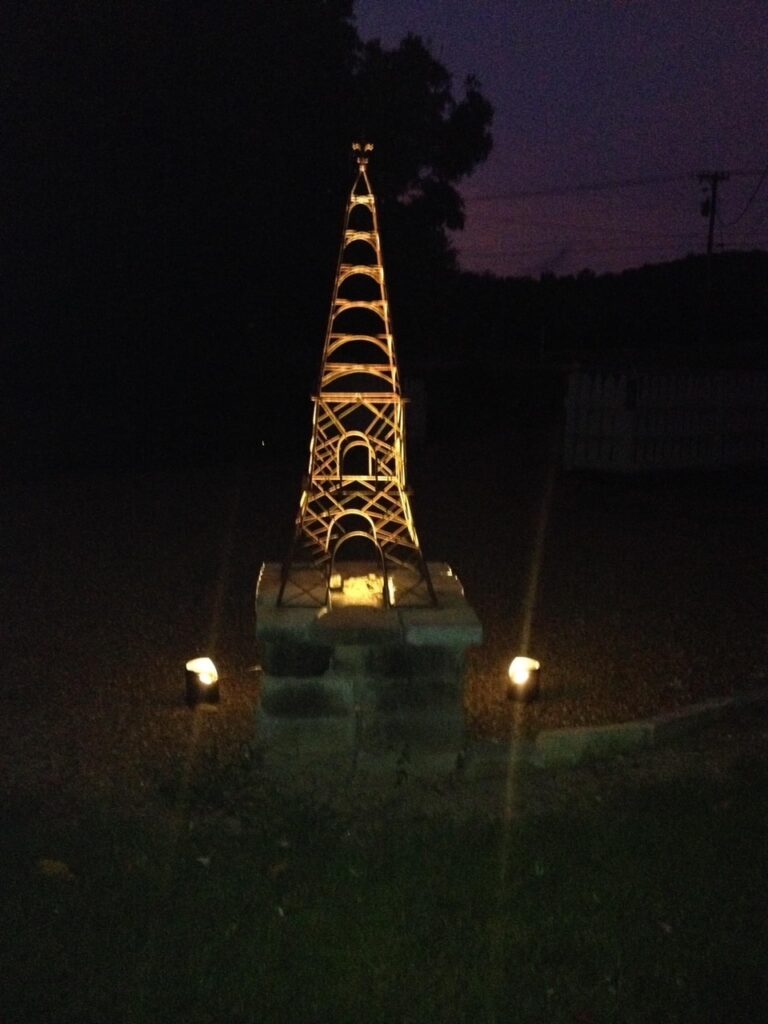
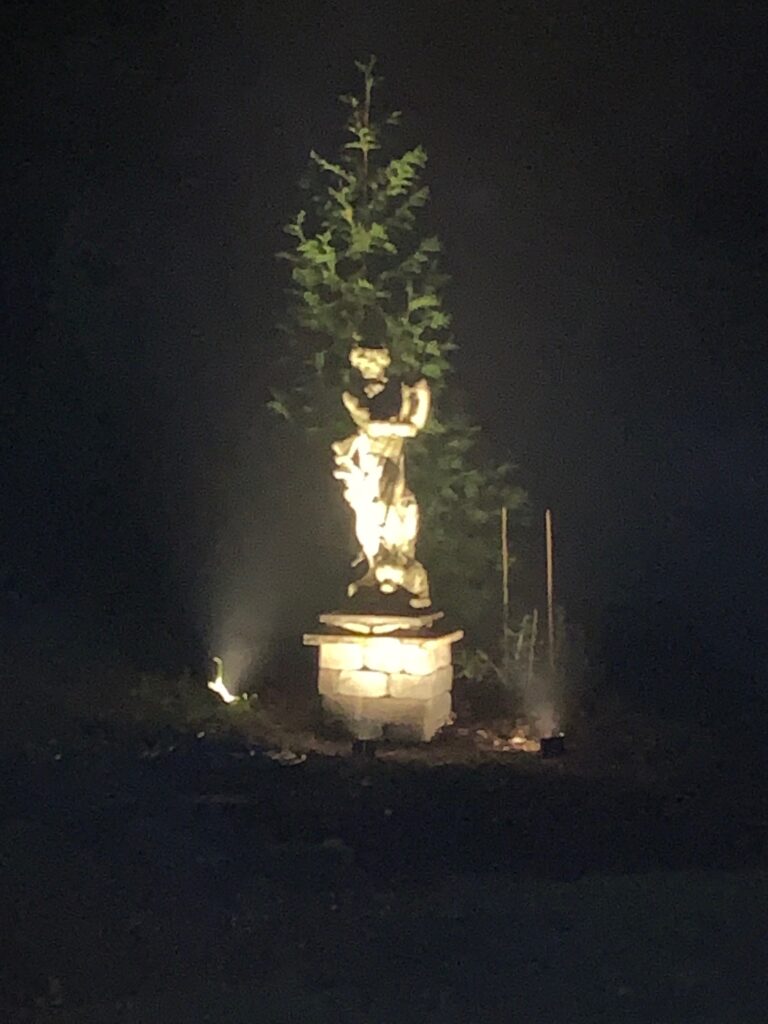
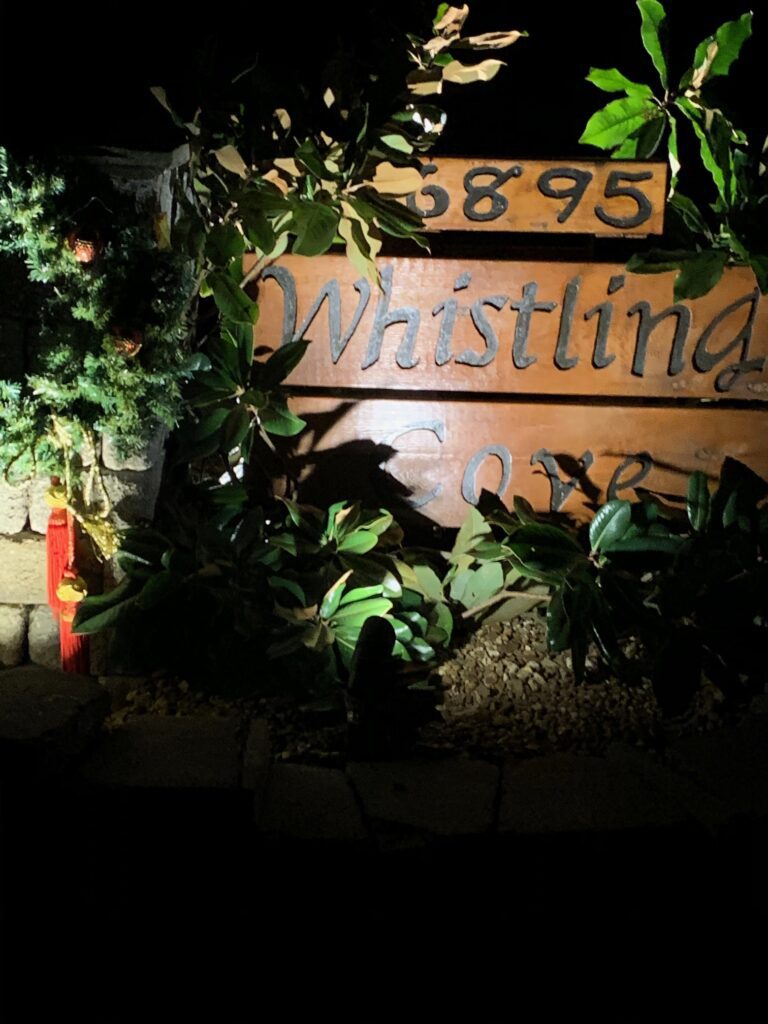
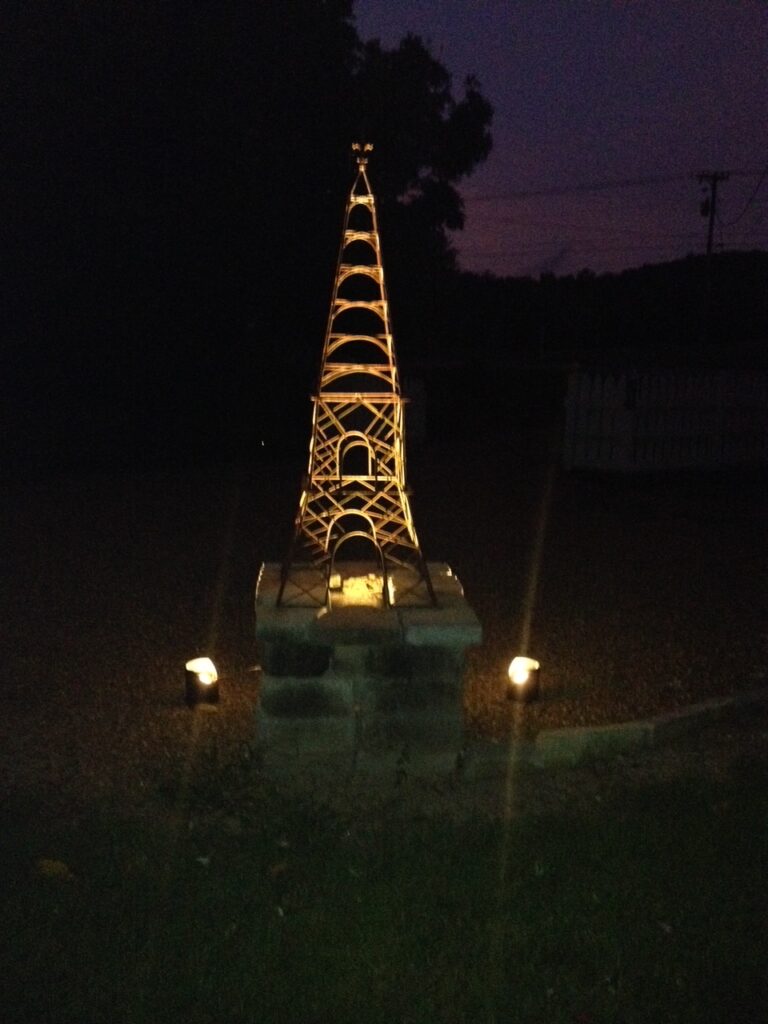
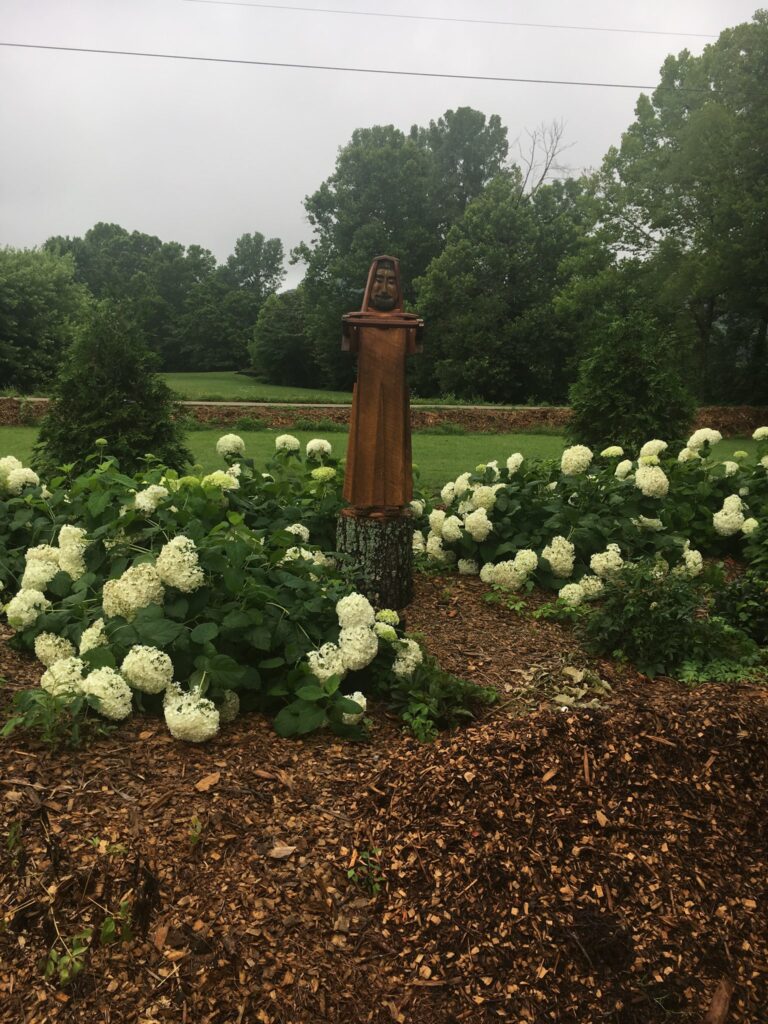
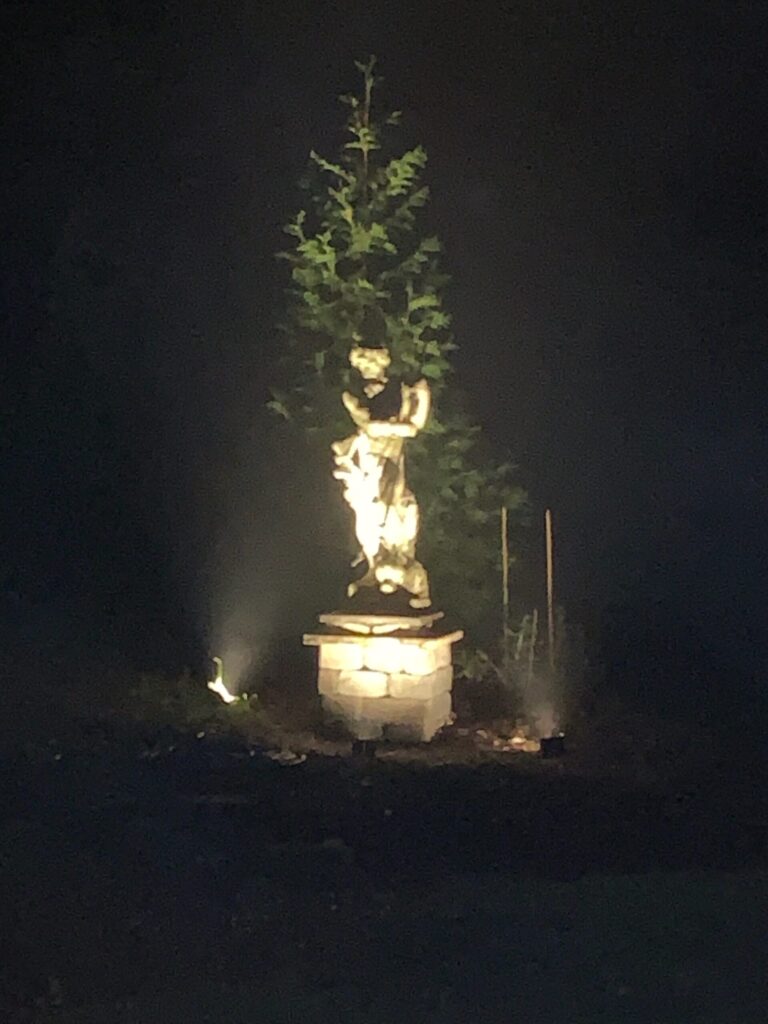
Powers Landscaping at Whistling Cove wins the Gold Award at the Williamson County Master Gardeners Show in 2004! Showcase with Copper obelisk on a pedestal with Landscape lights shining on it. The Copper pieces were made from a man in Clarksville. The Country Manor Stone with Flagstone Caps we built! We also incorporated a Tumbled Paver Patio that had a Romantic Sitting area! My Son Sheldon and I took from Sunday evening to Wednesday night to build the Garden working from morning till midnight each day! The finishing touches my Wife and Mother in Law Barbara Evans had the final touches with! Then we had to take it all down in a day afterwards.
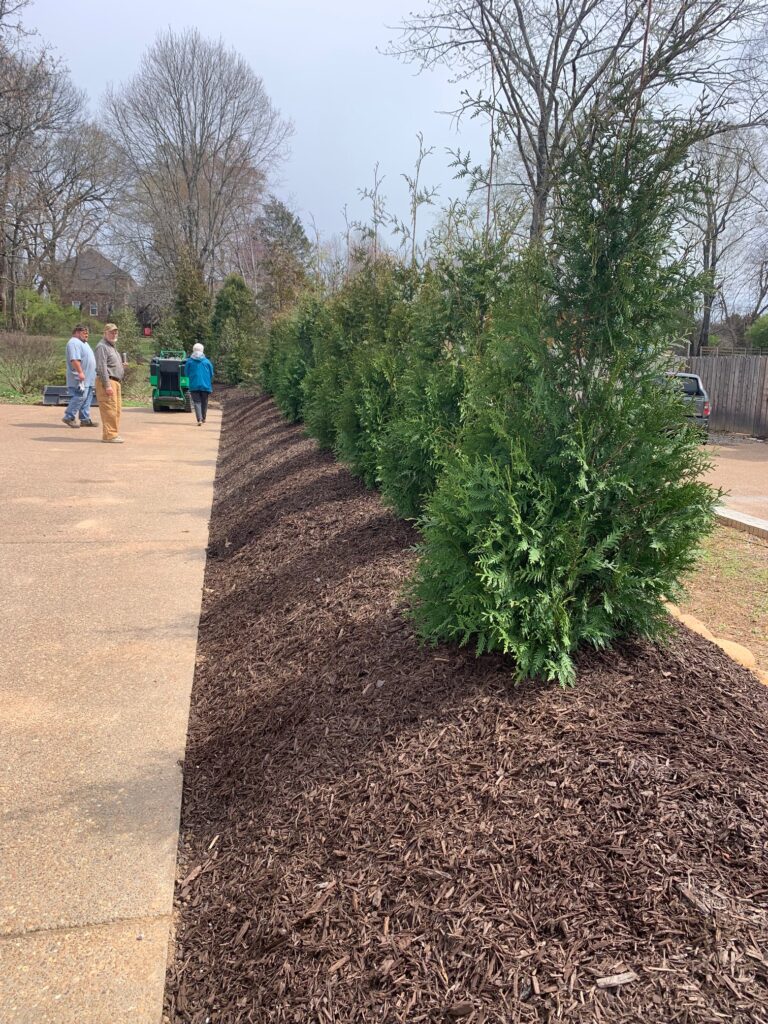
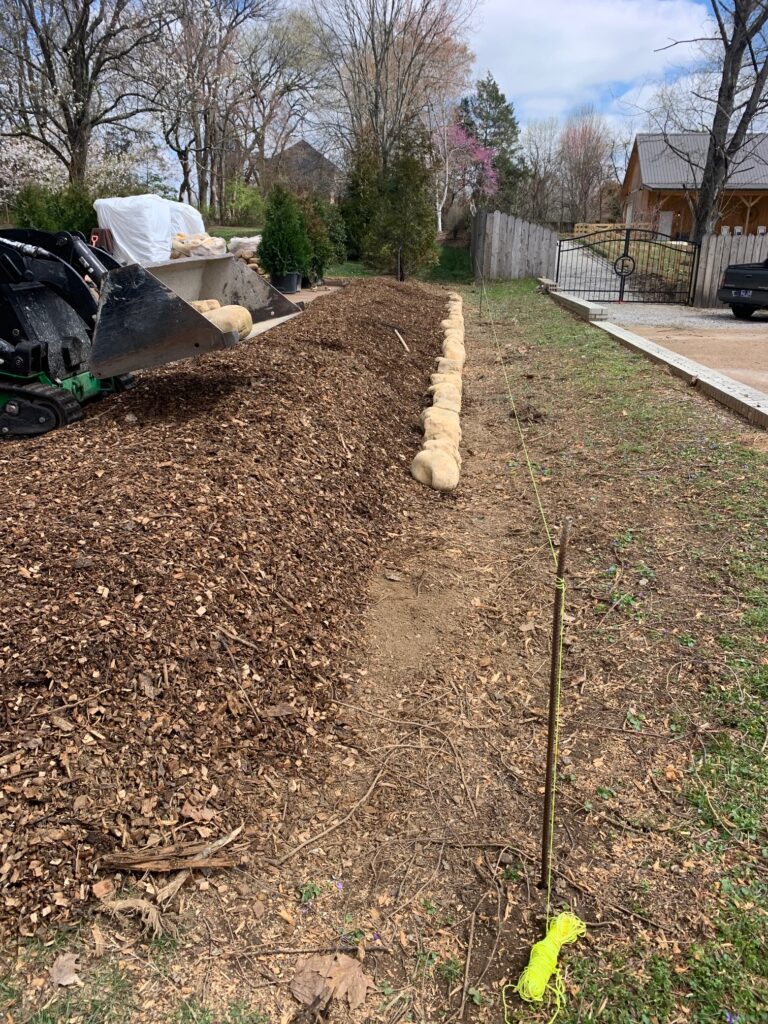
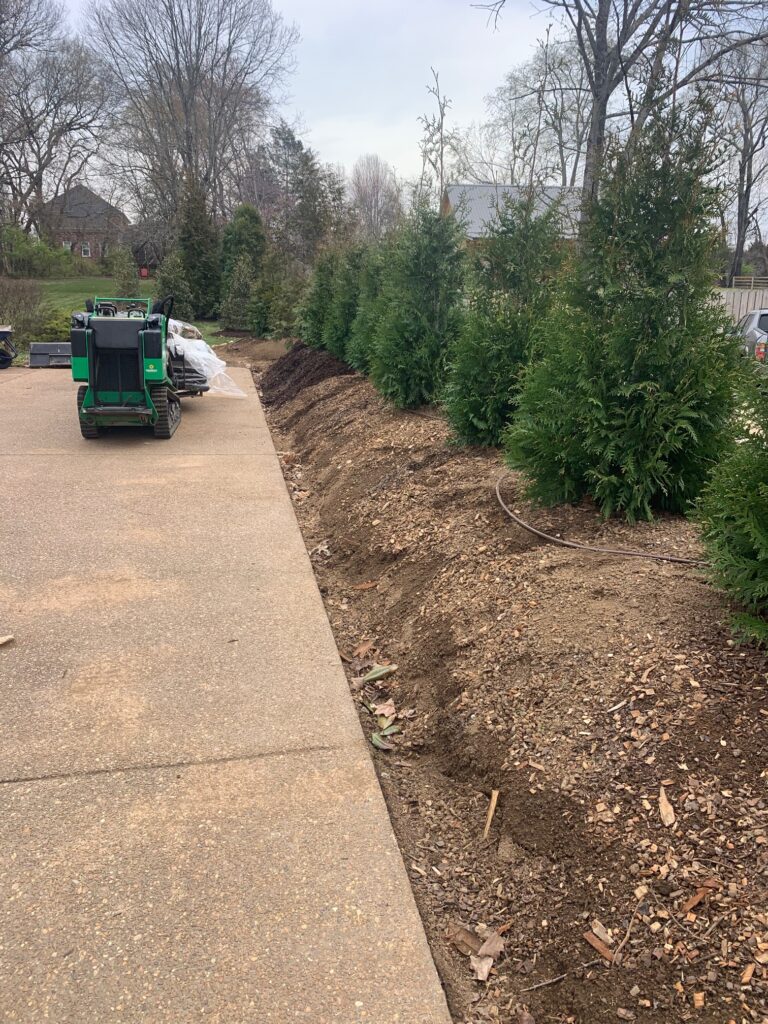
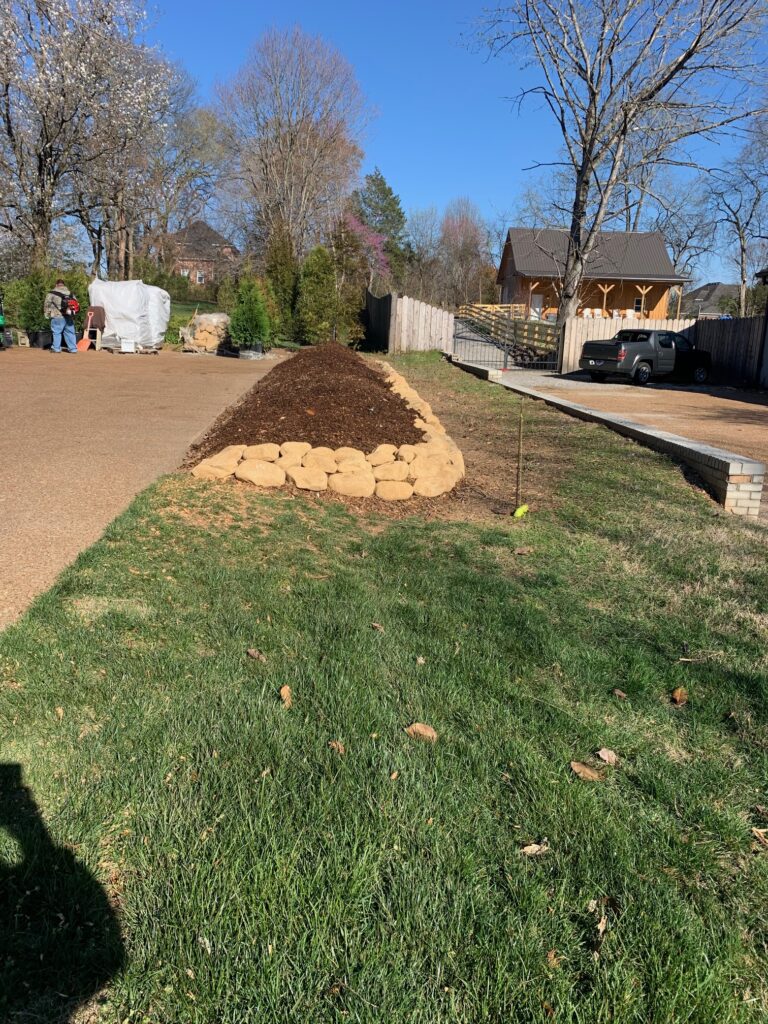
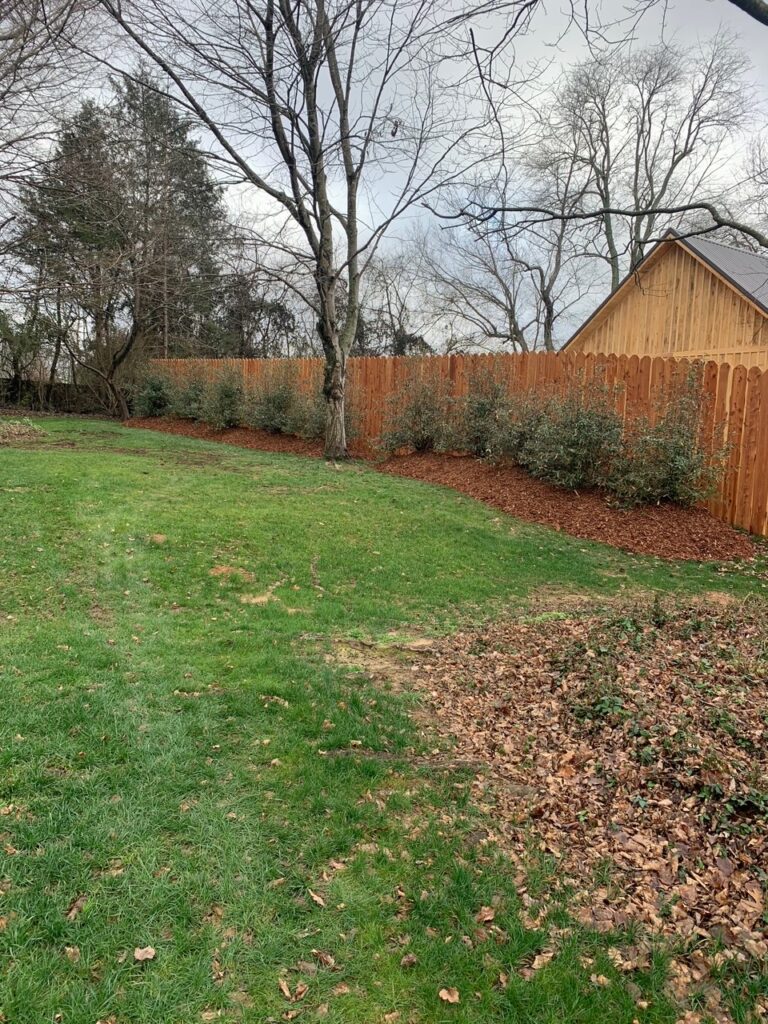
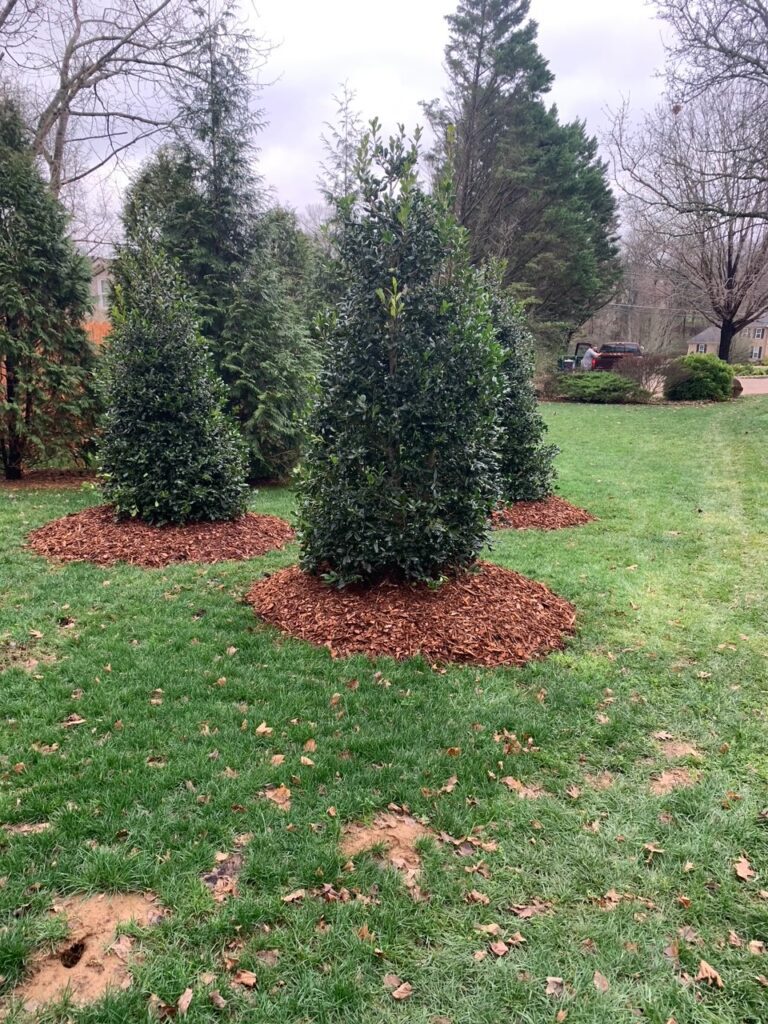
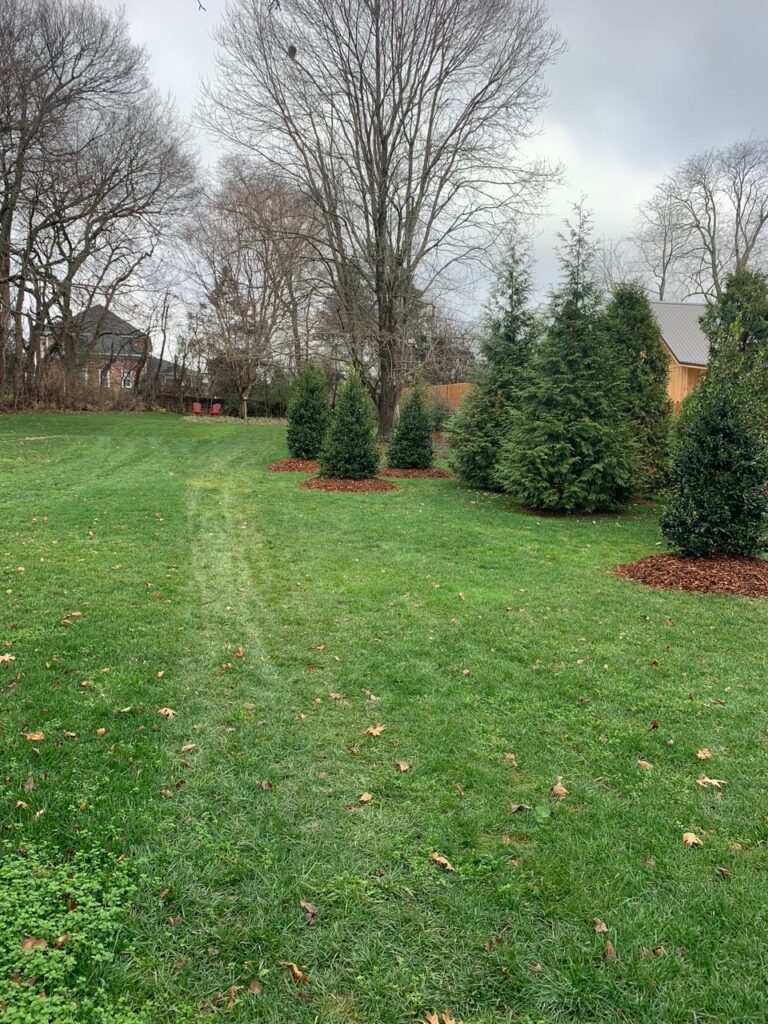
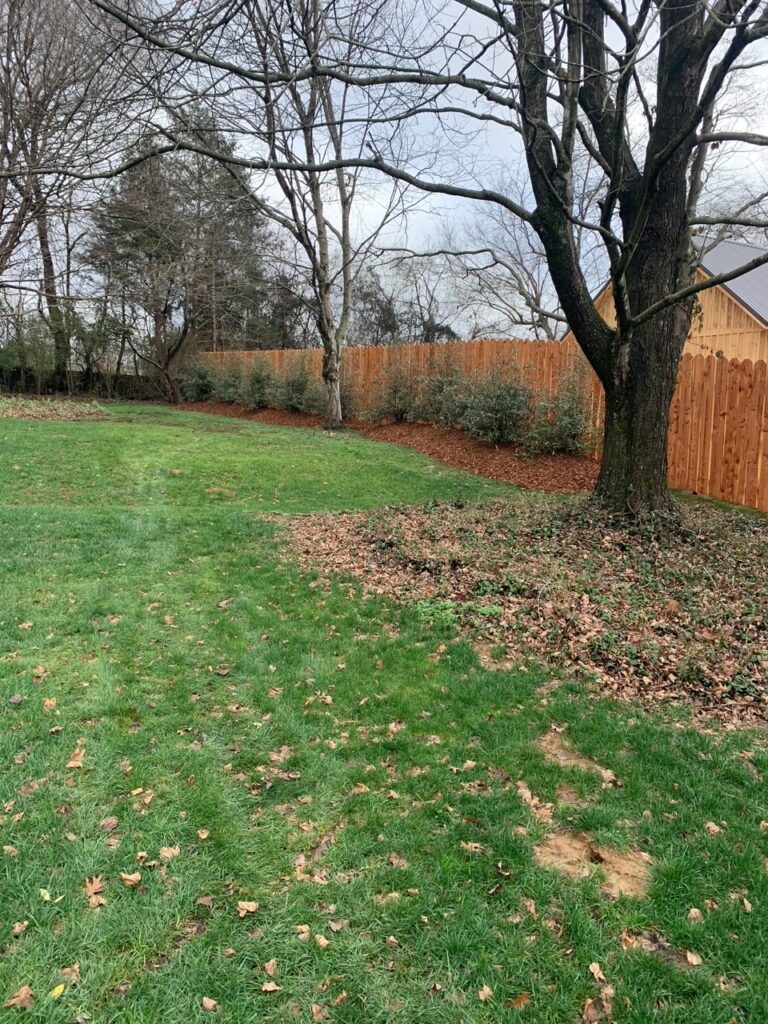
We came in and created a berm using rotted wood chips and Sifted Topsoil to give the new Evergreen’s lots of growing room for the roots. We created a retaining wall with River stones to hold the soil in place. When we planted the Evergreens we used Whistling COVE Compost around the plants.
Finally we used a weed preventative and mulched with Brown Mulch.
Our client was very impressed and happy with the results!
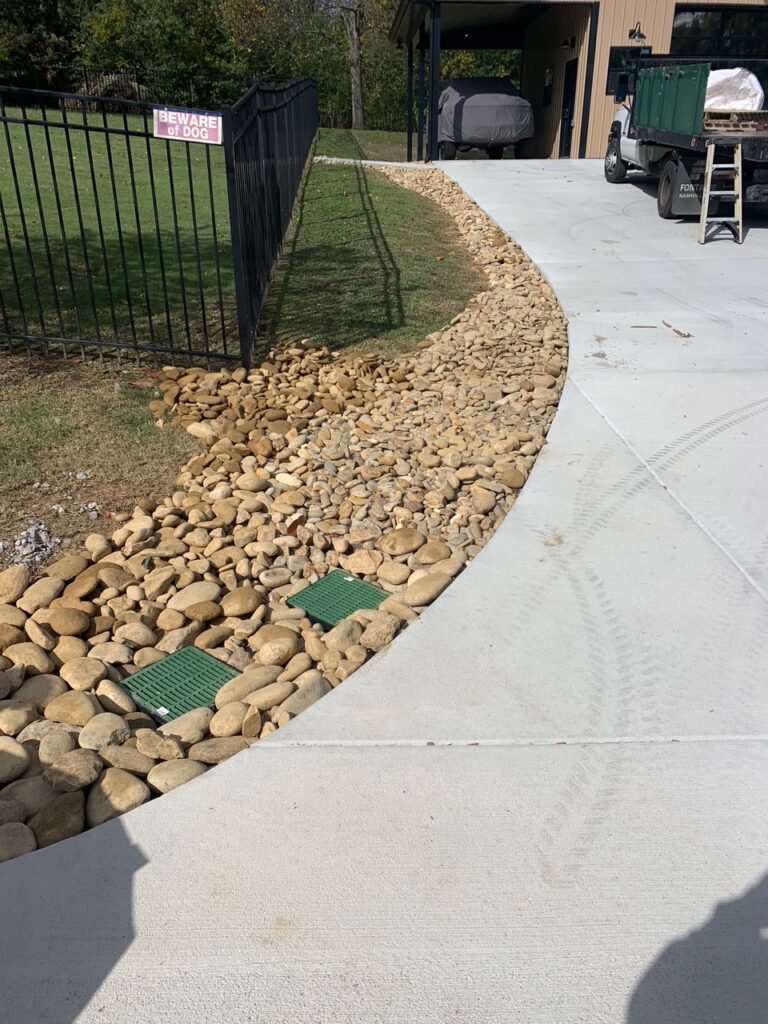
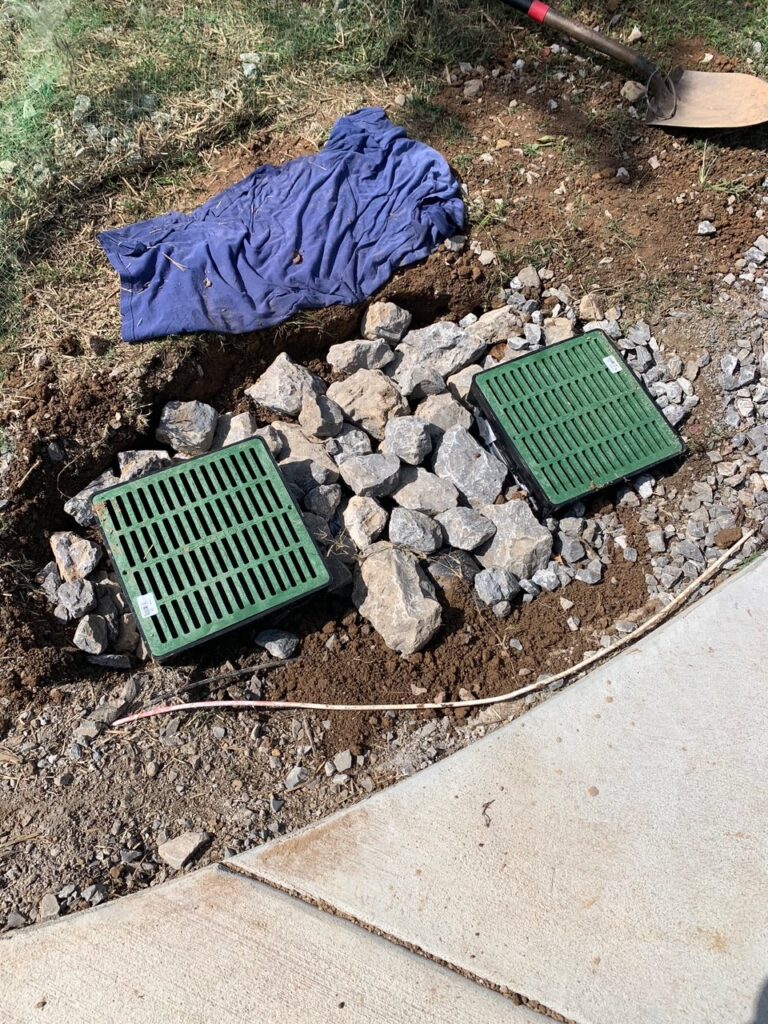
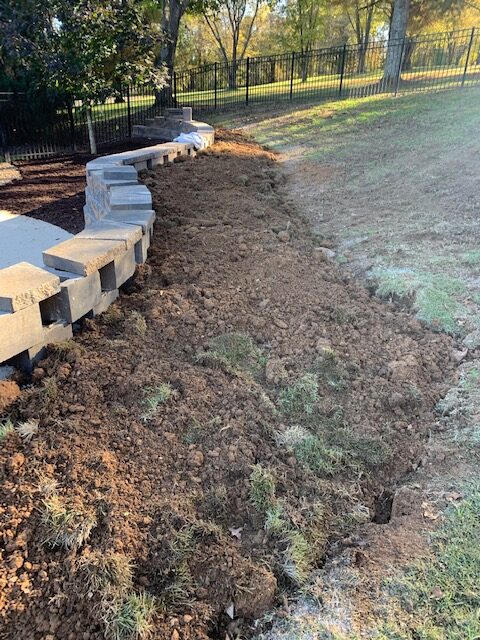
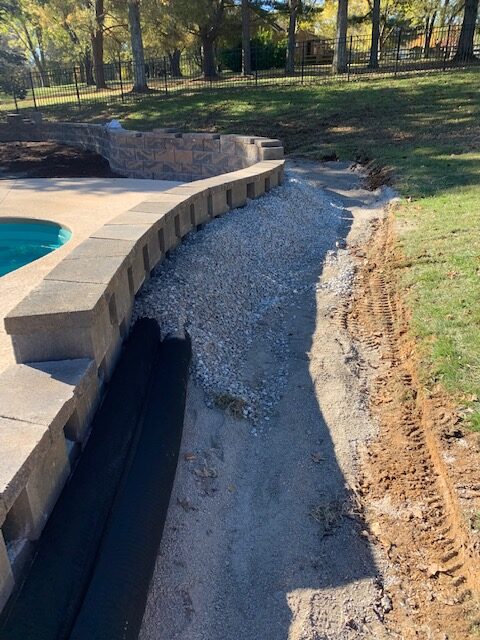
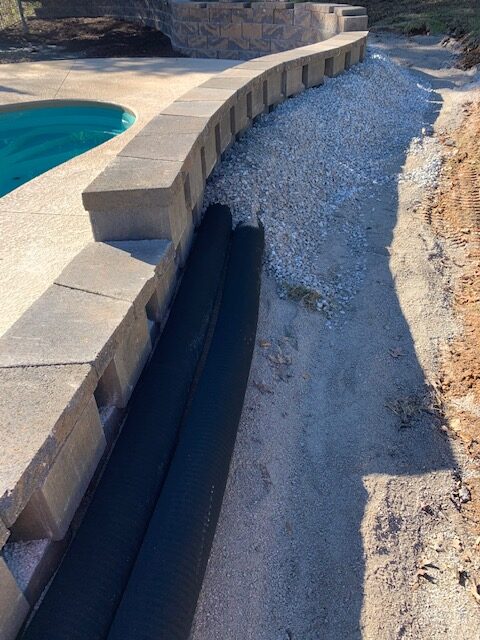
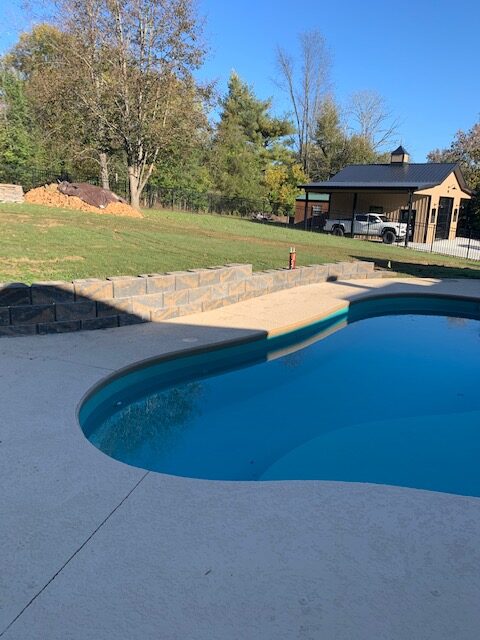
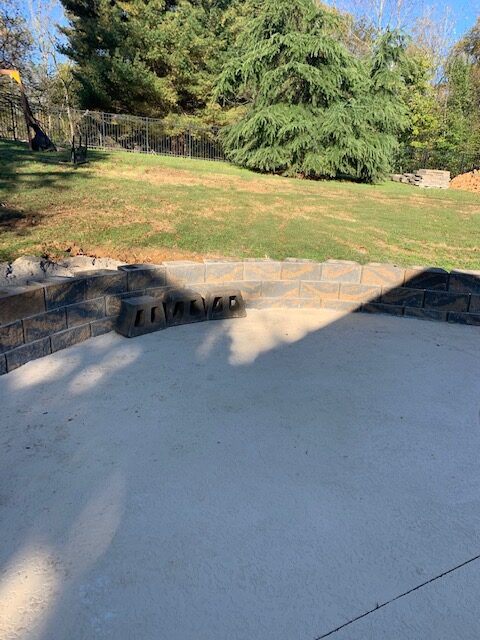
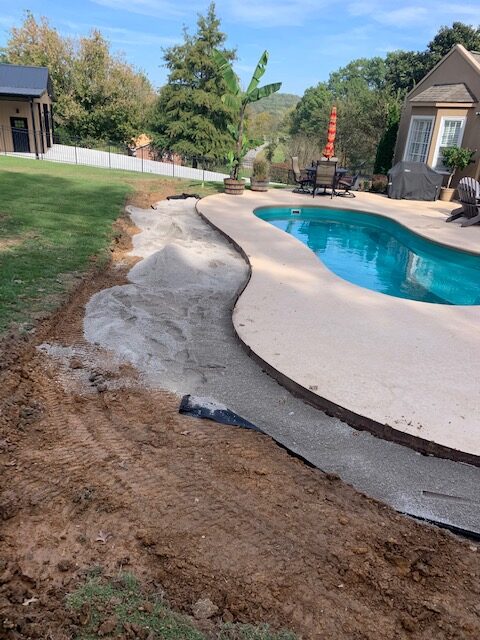
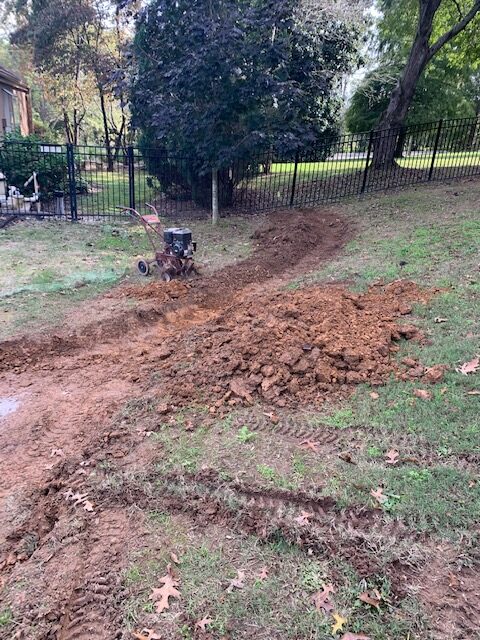
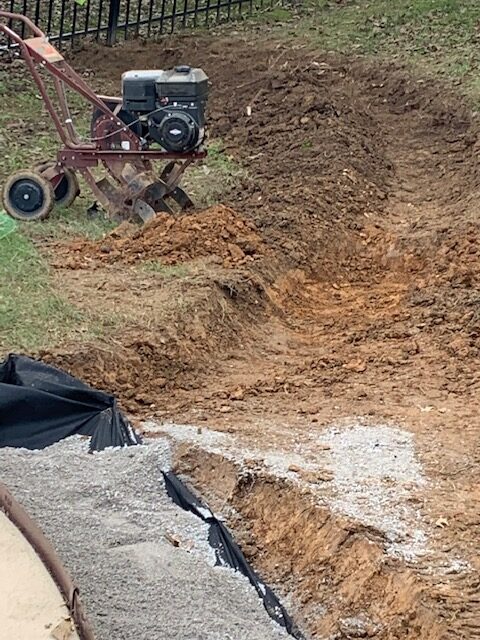
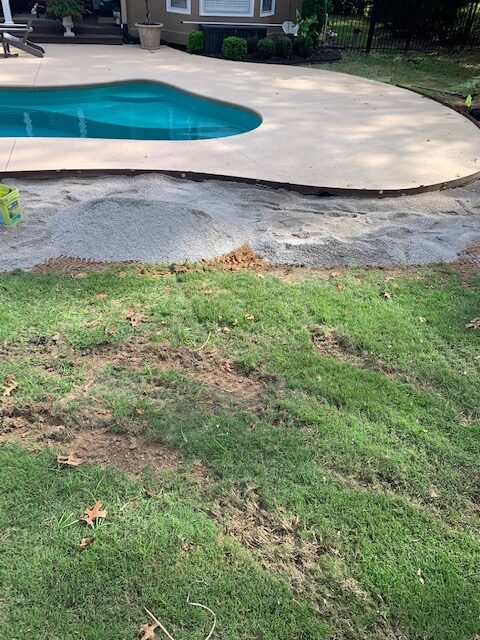
We had to take priority with the drainage around the pool and direct it outside of pool area . We dug trenches with positive drain flow and upsized pipe from Gutters to 6 inch Pvc pipe with Emitters at each end of pipes. We then had to address the pool pump wash out. We dug a cistern for the wash out to go in outside the pool area as well.
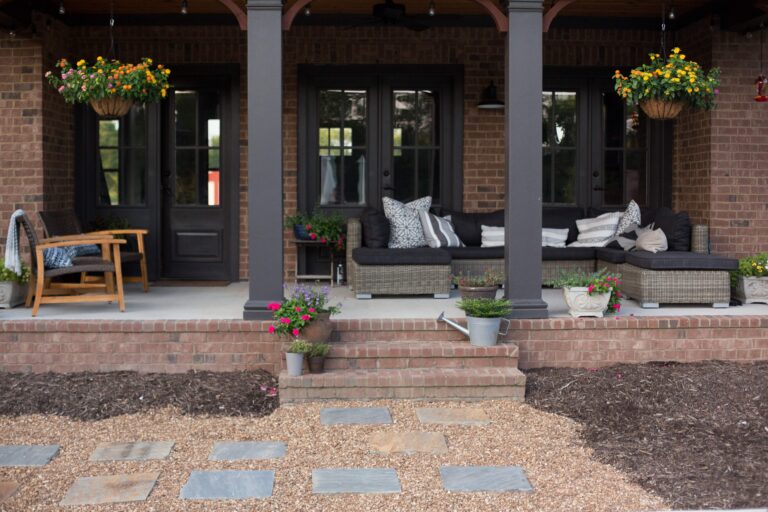
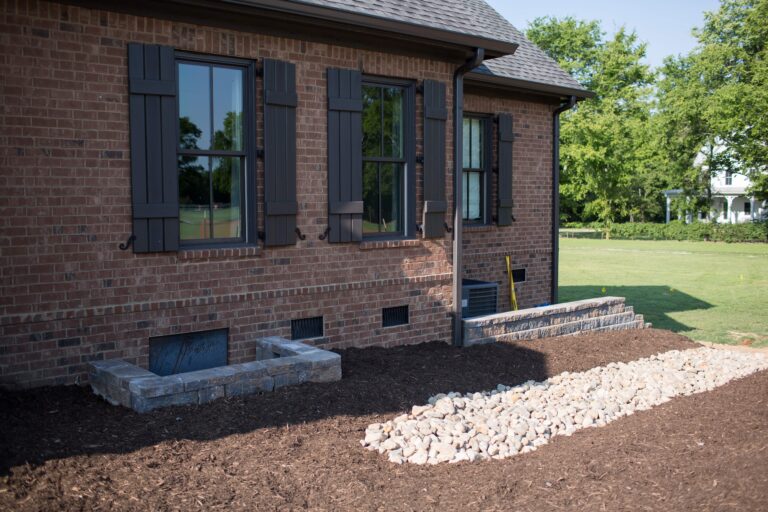
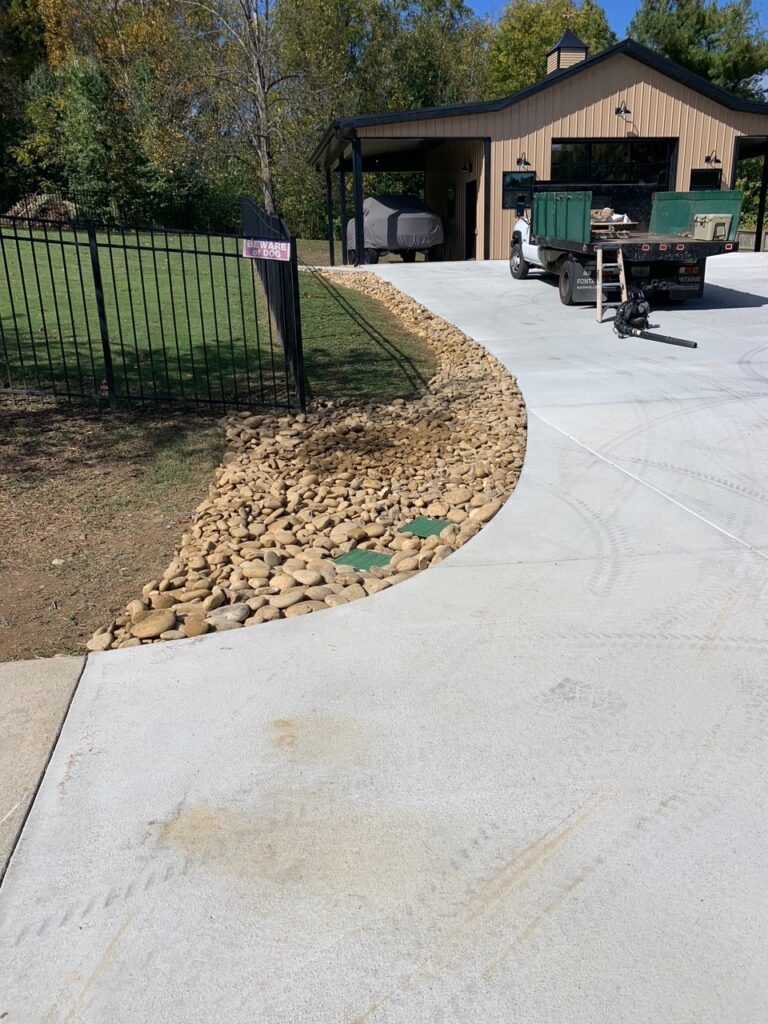
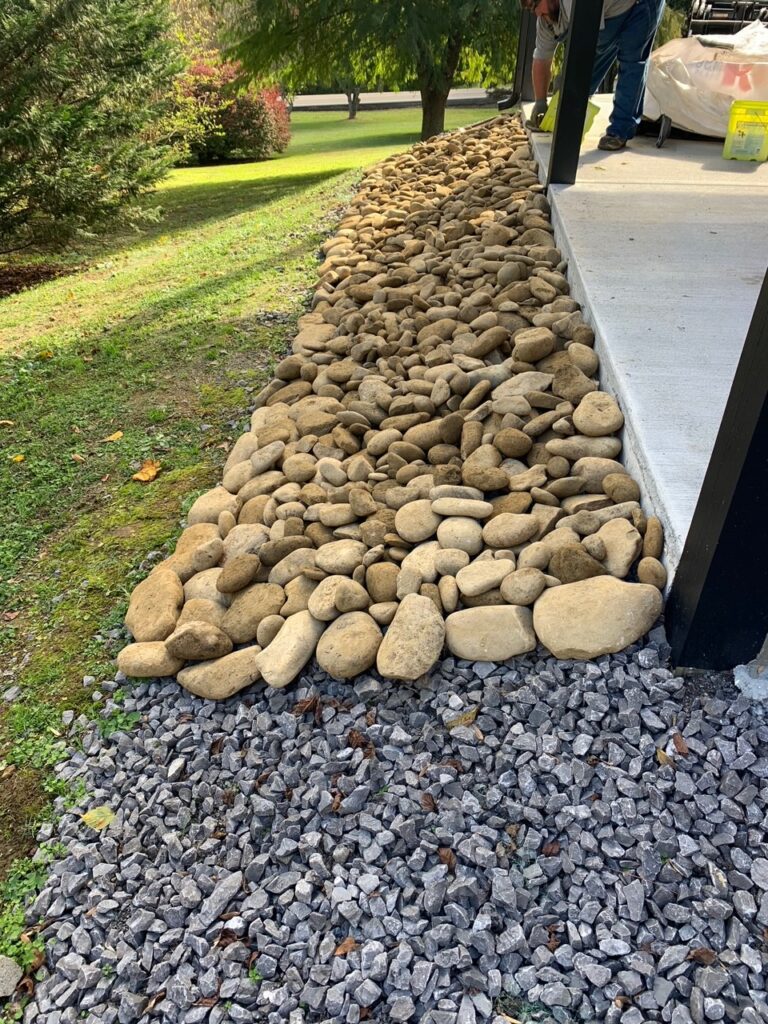
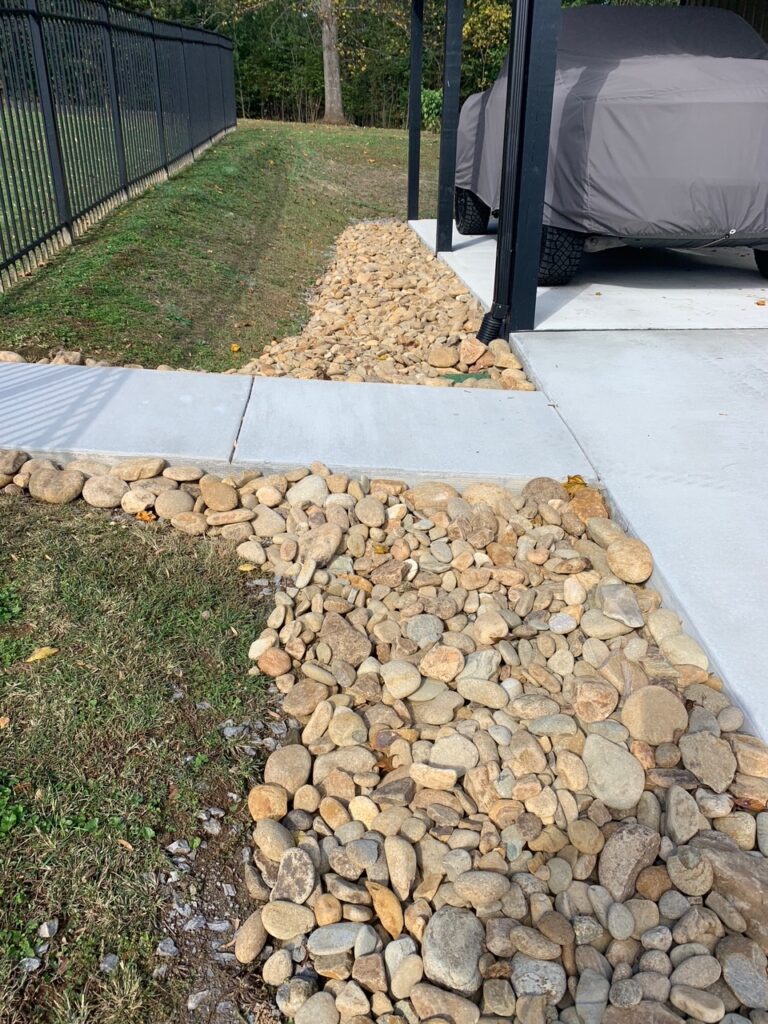
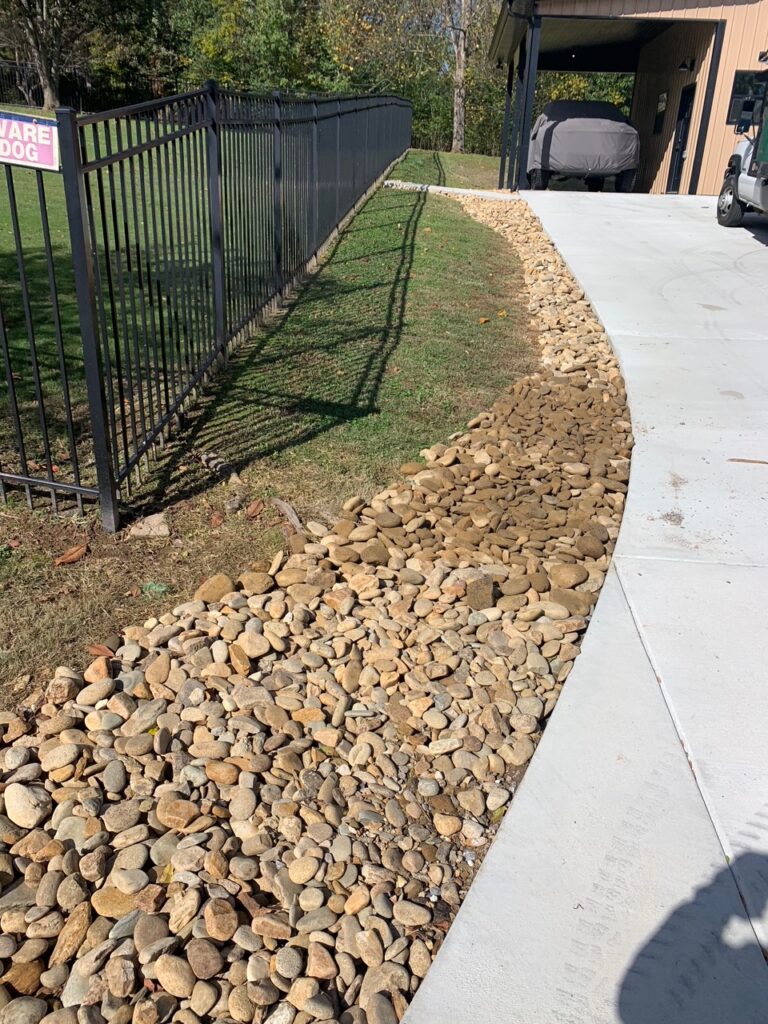
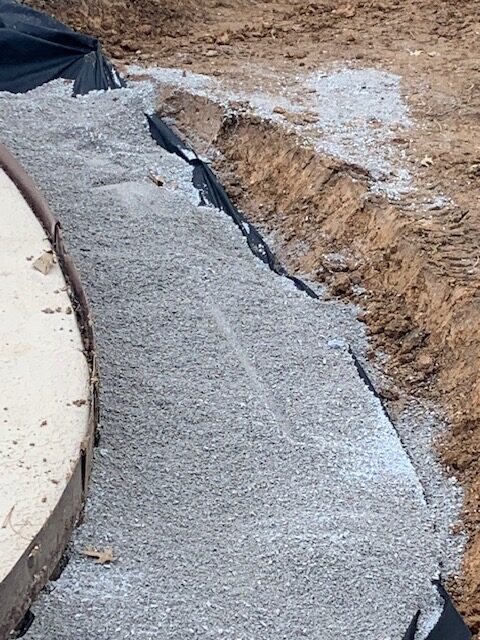
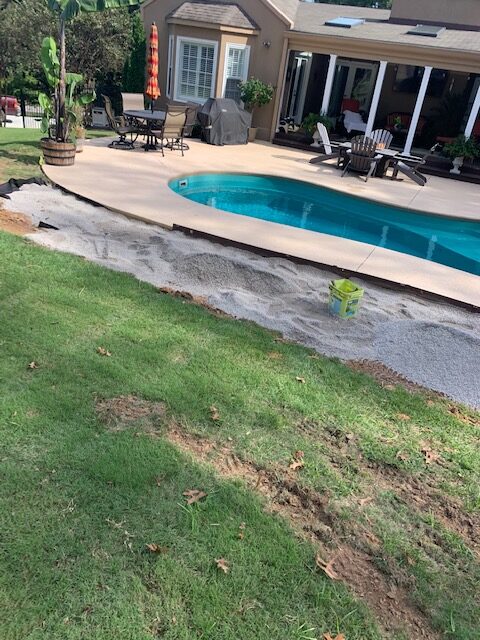
We dug up all the existing grass around the pool and laid Landscape Fabric two layers deep .Angela and I then discussed overall finished look and final grading with Sifted Topsoil and Whistling Cove Compost for Plantings . We addressed issues for dry creek bed and A.C unit along with Foundation Vents.
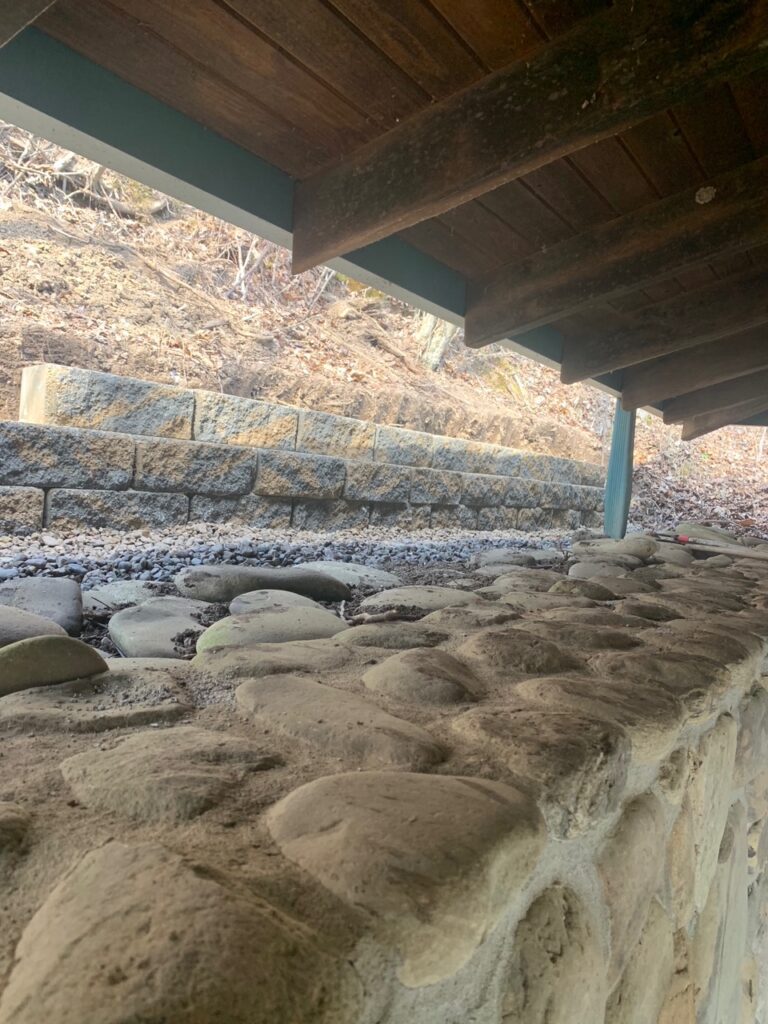
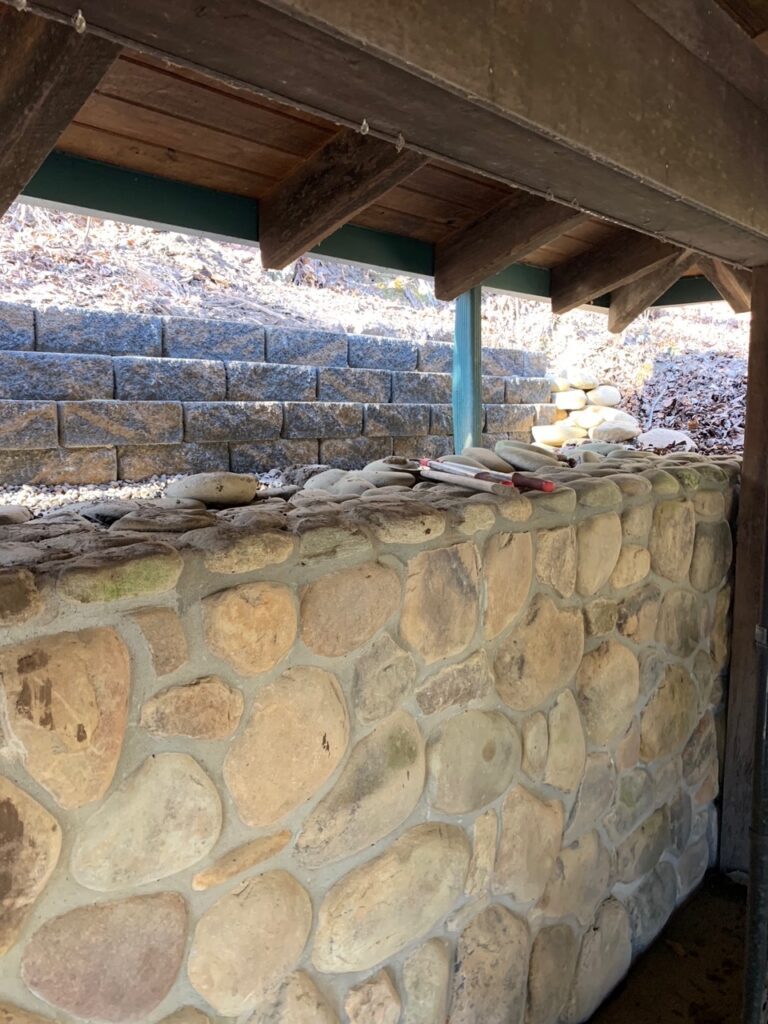
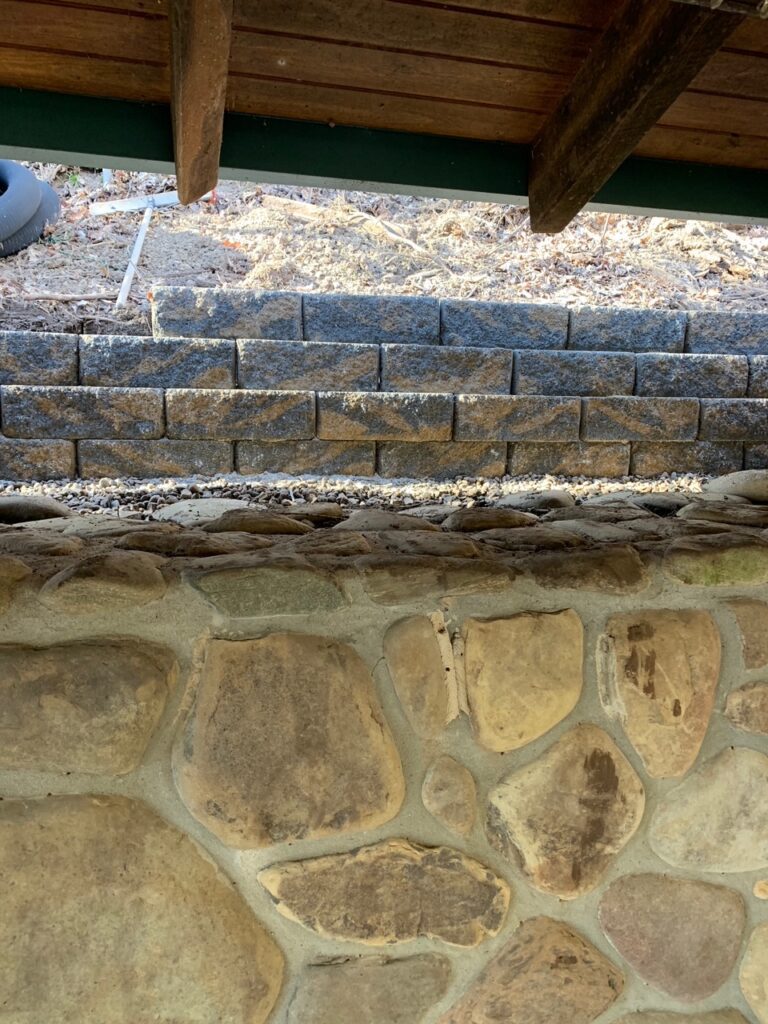
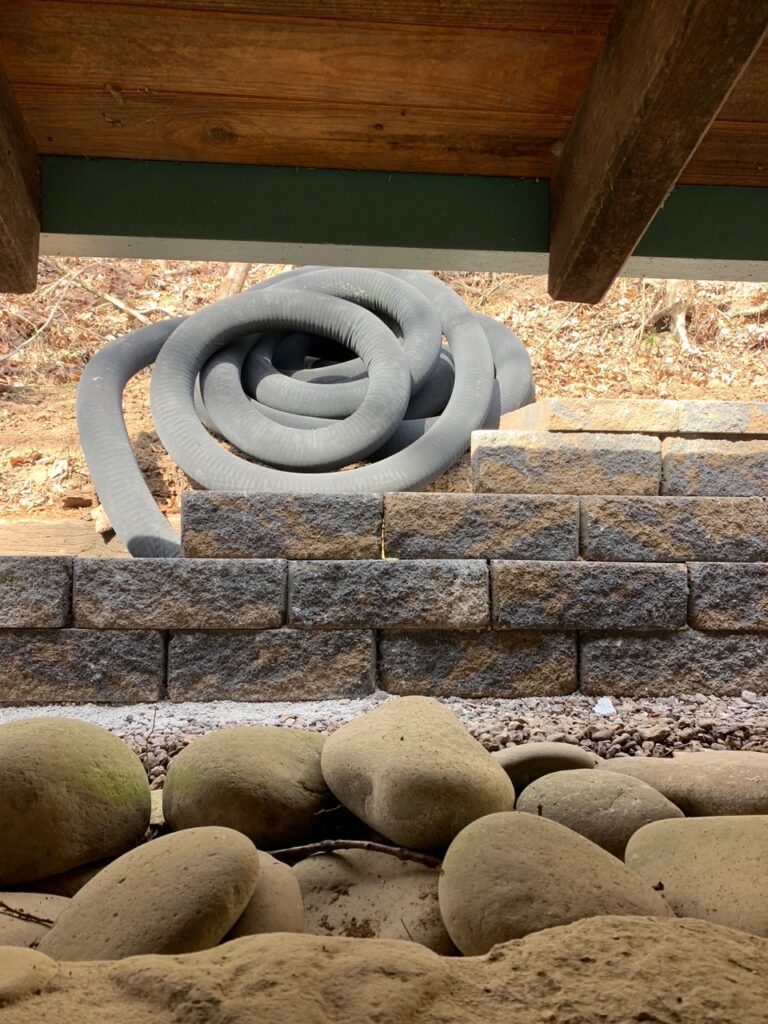
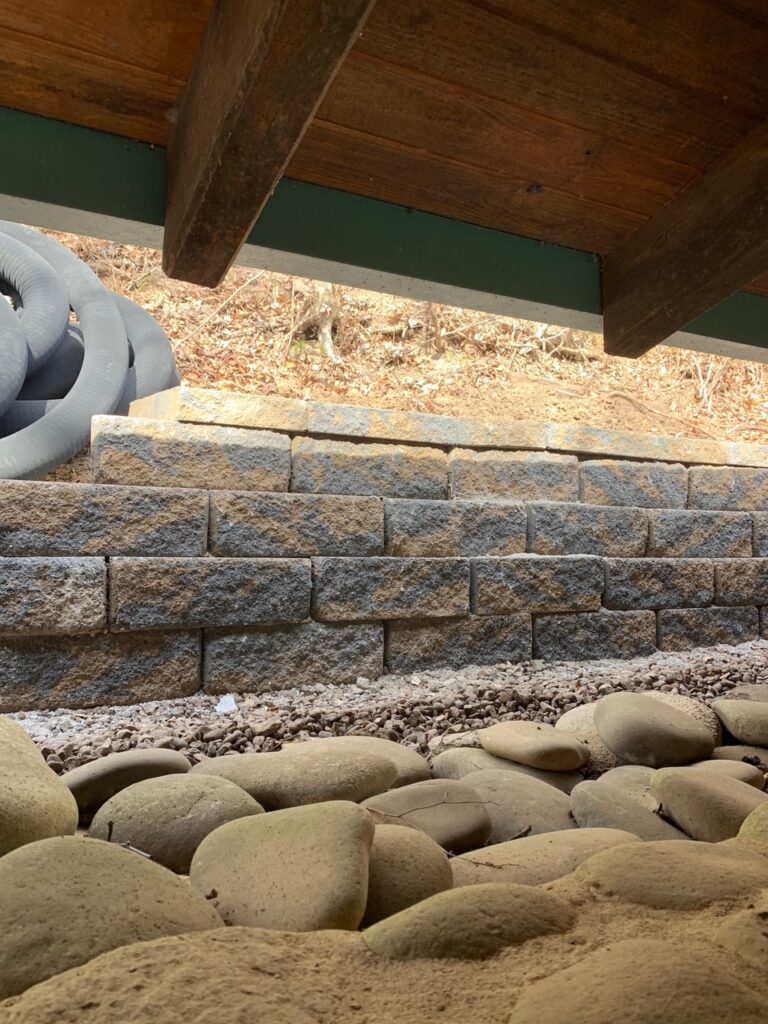
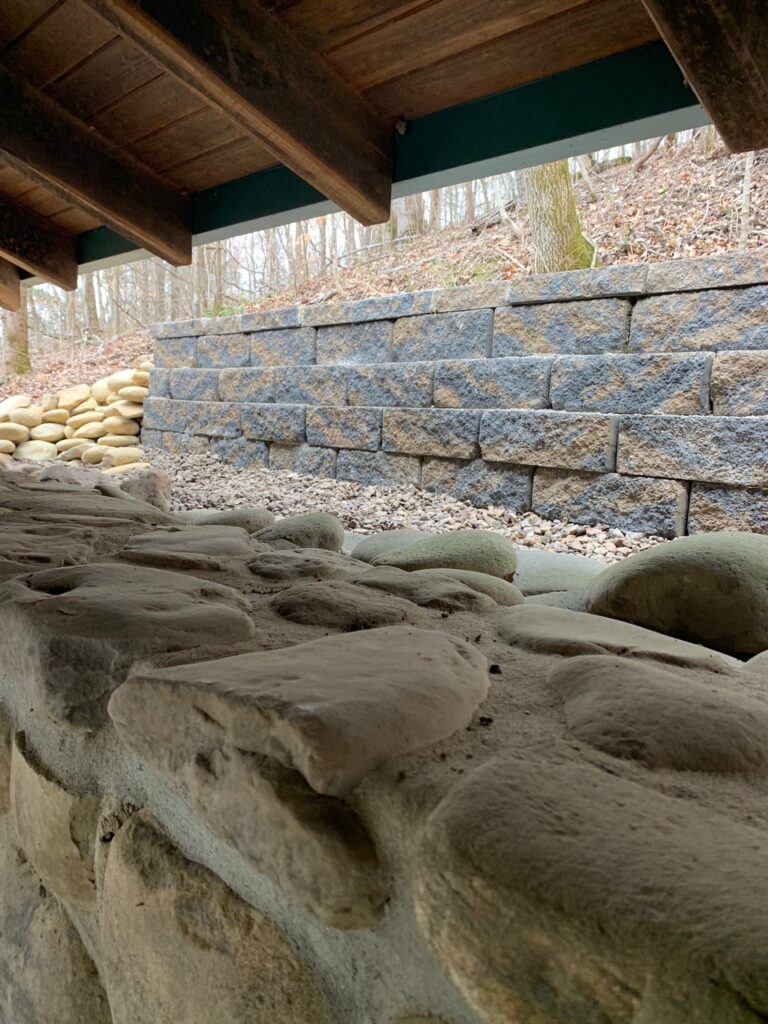
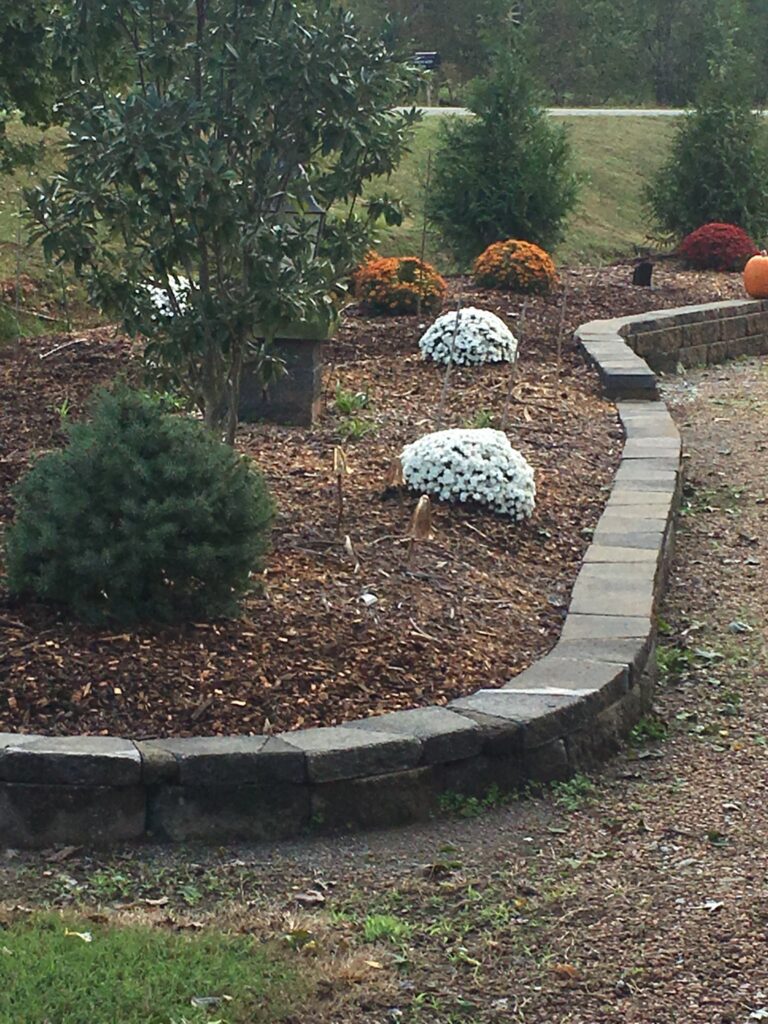
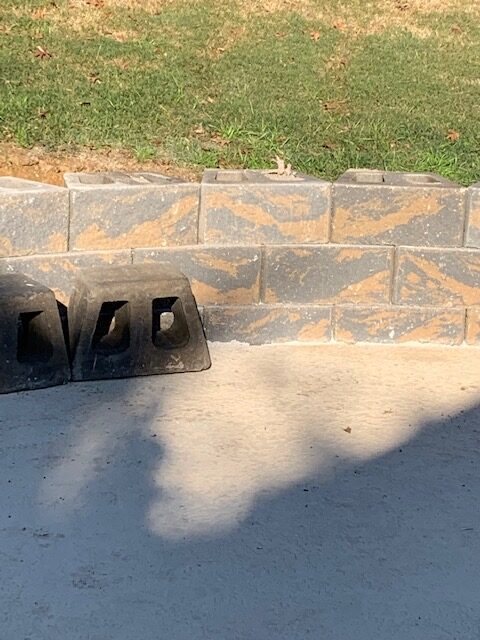
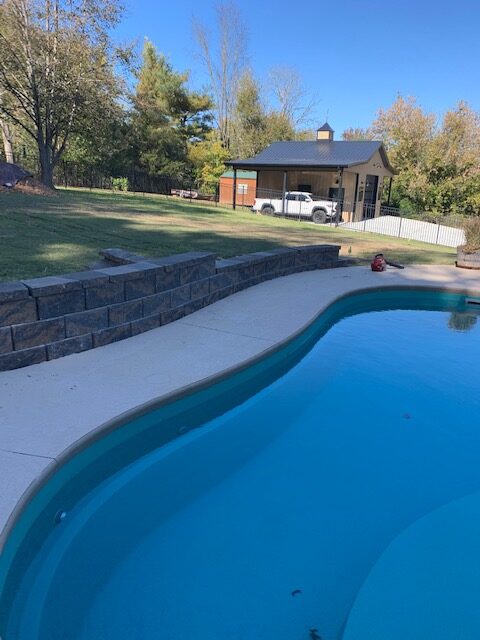
Here we used a Tan and Charcoal blend Retaining wall block as shown in the pictures. We then used a decorative stone behind walls for aesthetics and to keep grass out of area.
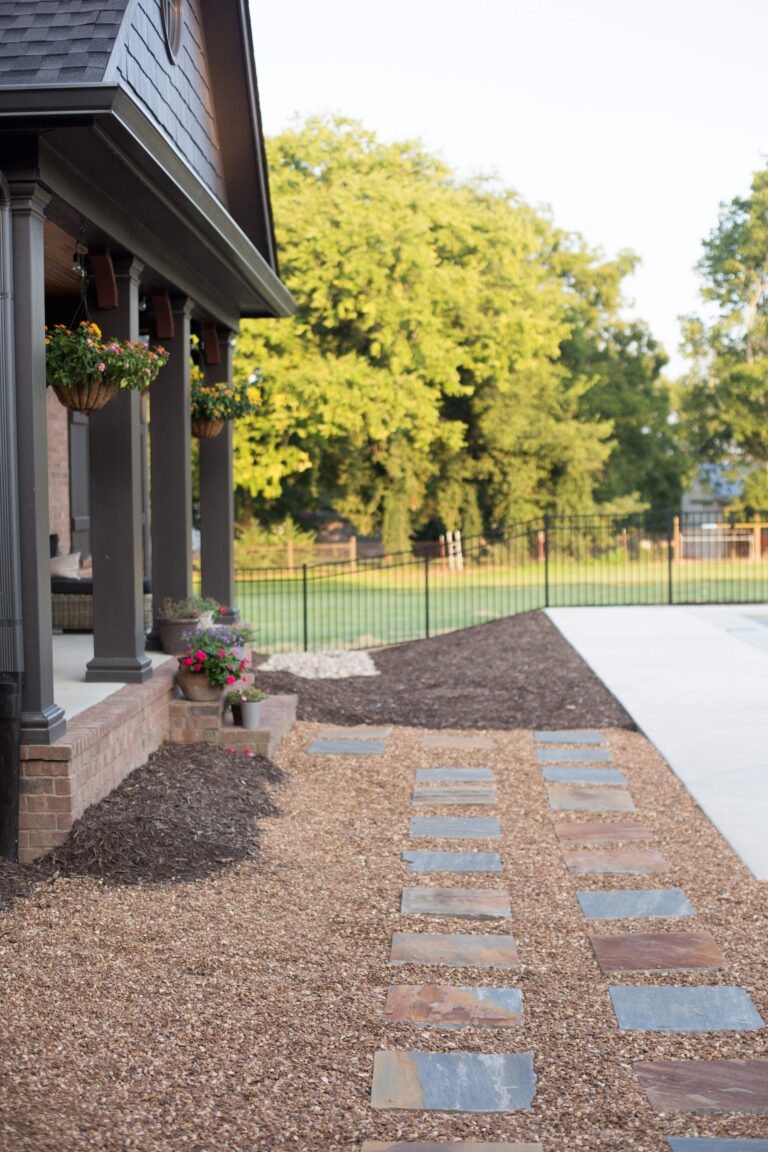
We then hauled in 44 tons of Pea Gravel applying it to areas shown in pictures along with Cut Flagstone Stepping stones. We created a HERB Bed close to House for Angela along with a Stone Raised Bed Garden filled with Whistling Cove Compost also shown in pictures. To hide Pool Pump we created a Berm and installed Arborviteas to hide pump .
Plantings come later when time is right and we will plant Hydrangeas and Mark Anthony Liriope and many other Beautiful plants.
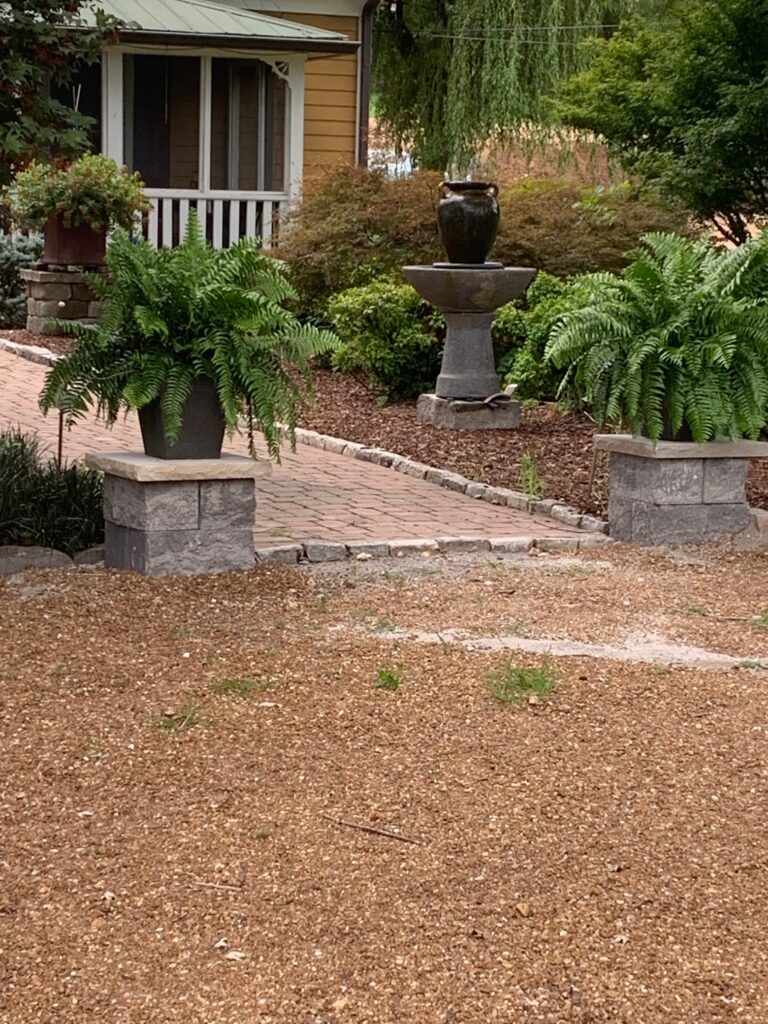
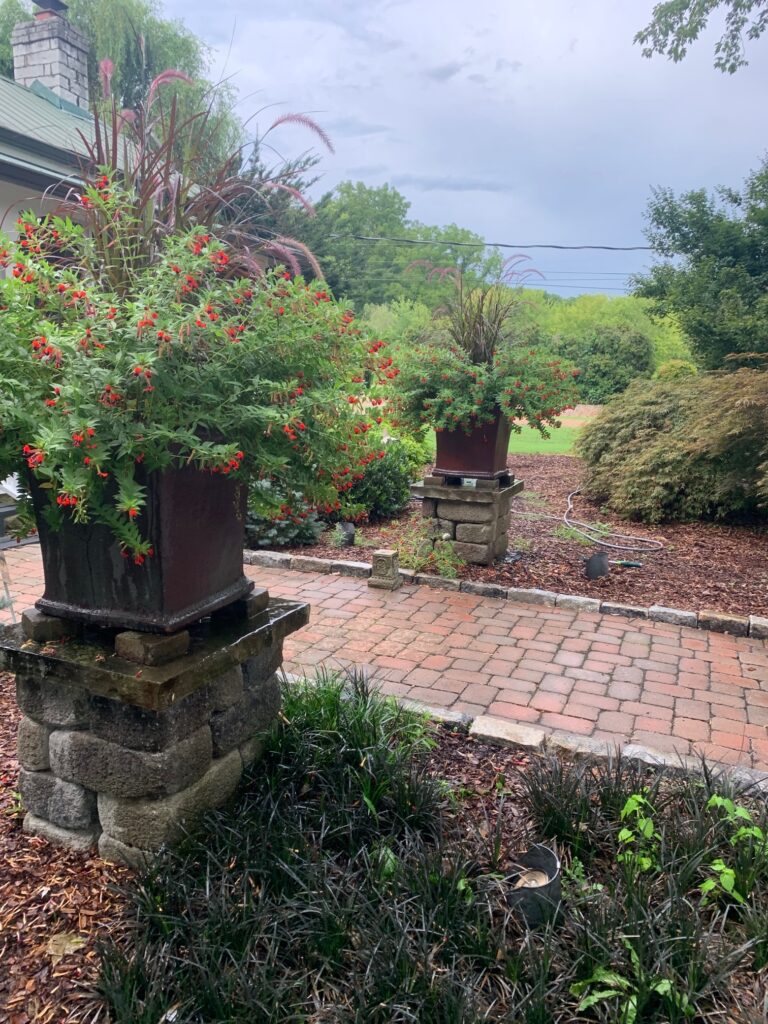
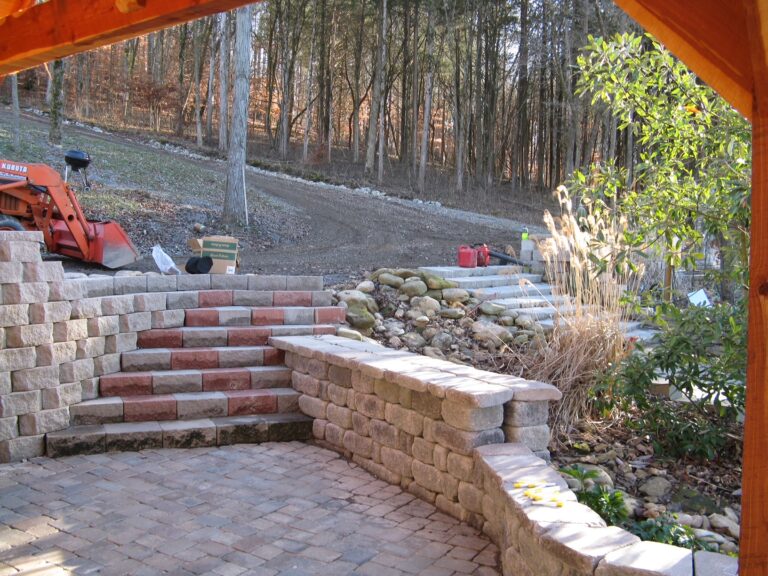
We Built the Paver Walkway and laid a muster k pattern using Brick color pavers. We outlined the Walkway with Cobblestone and the Stone Columns we Built using materials that we were able to use at the time.
The Entrance Stone Pedestals we built using a new Stone and we Capped with a Chisel Face Capstone.
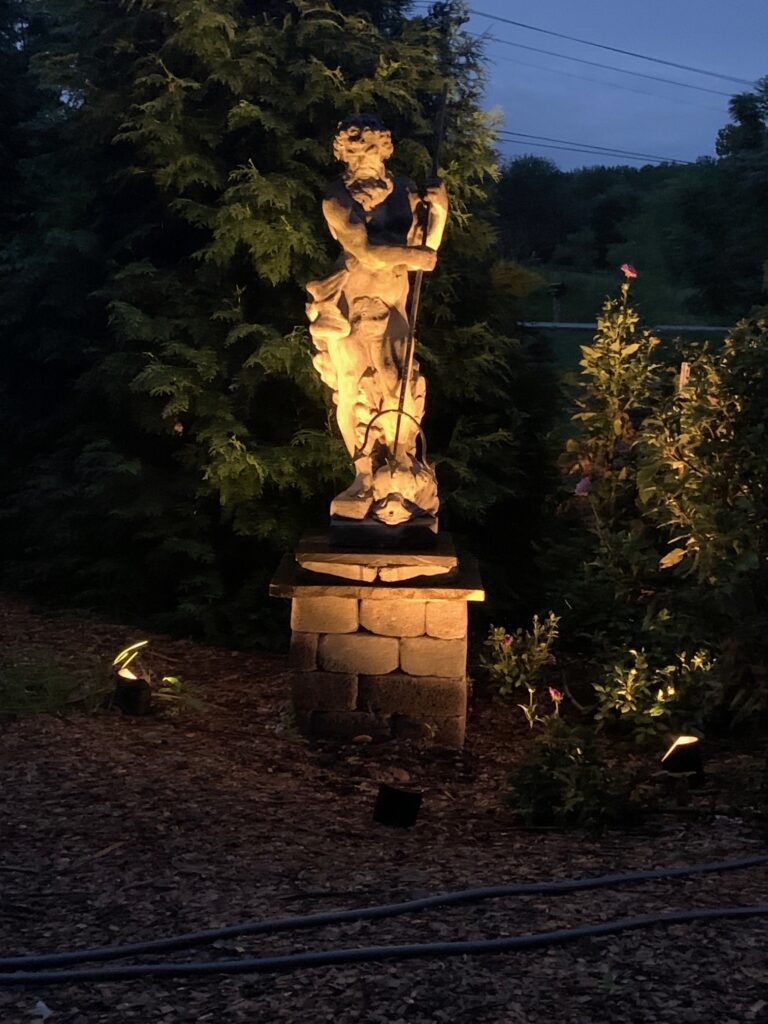
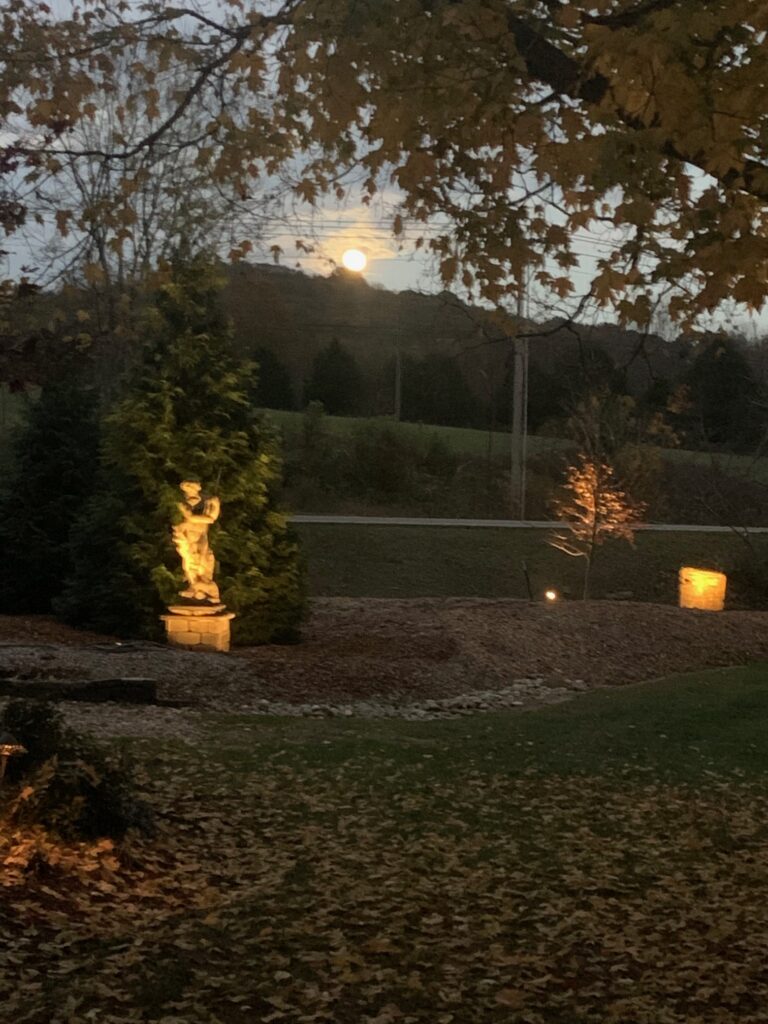
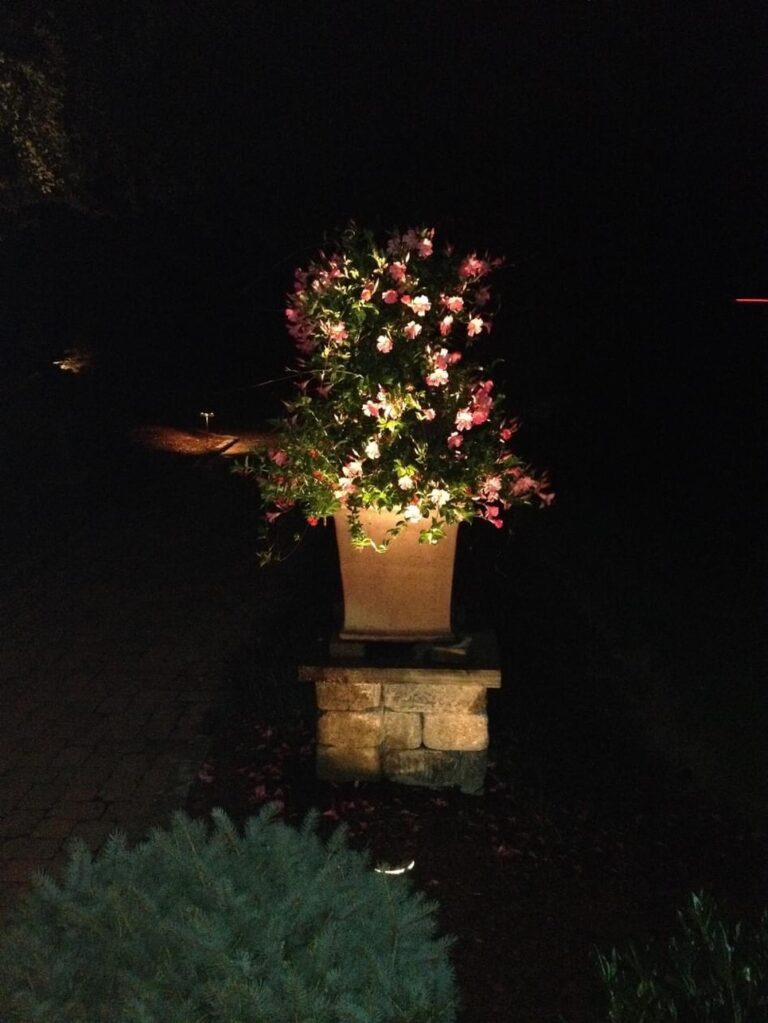
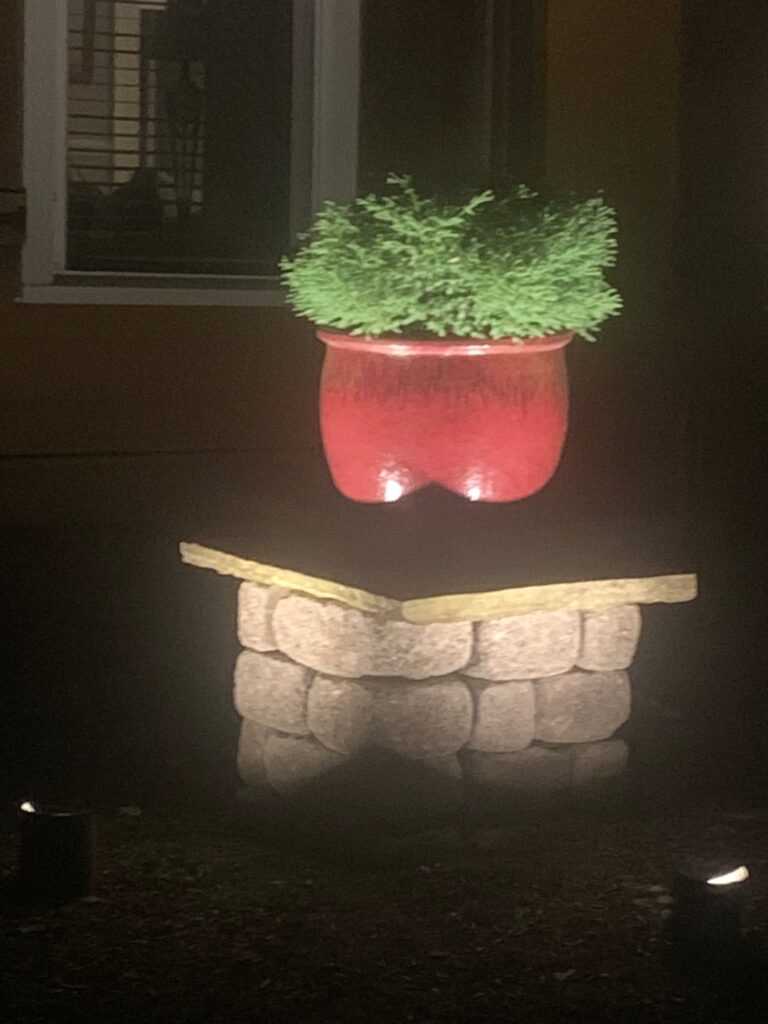
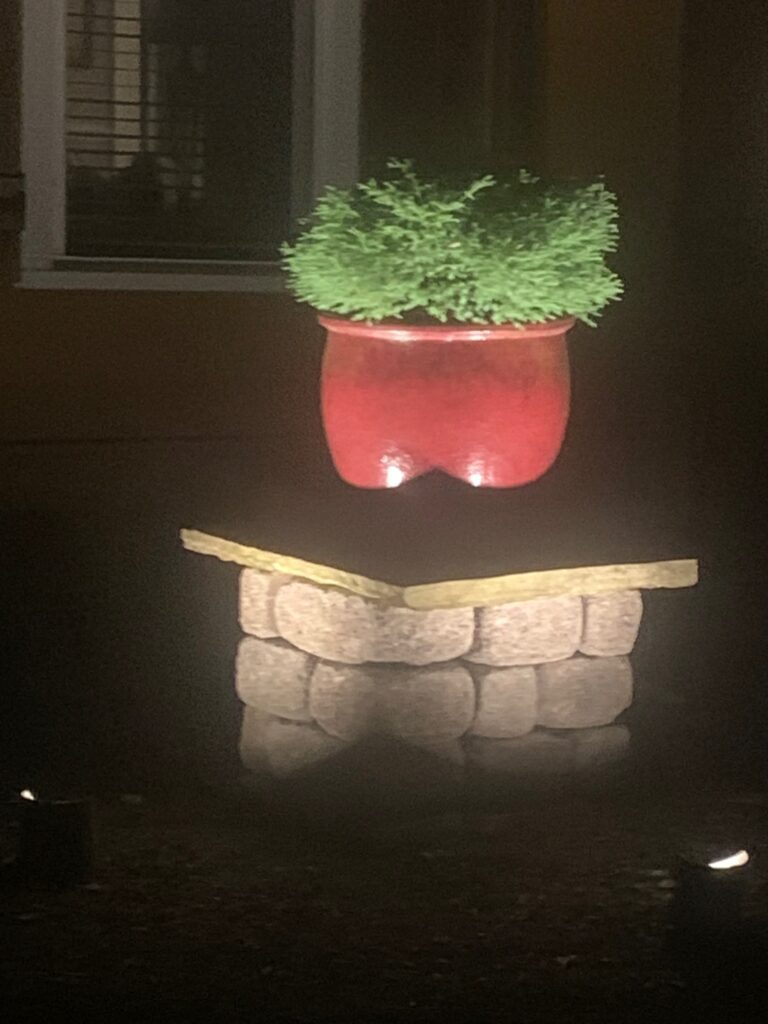
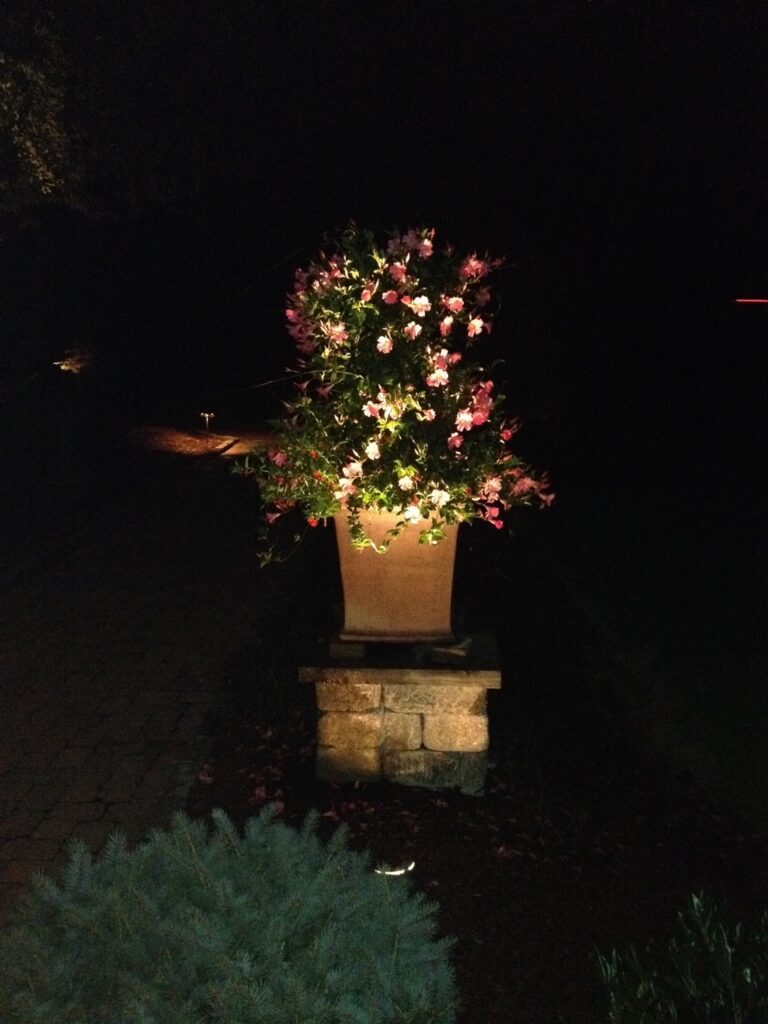
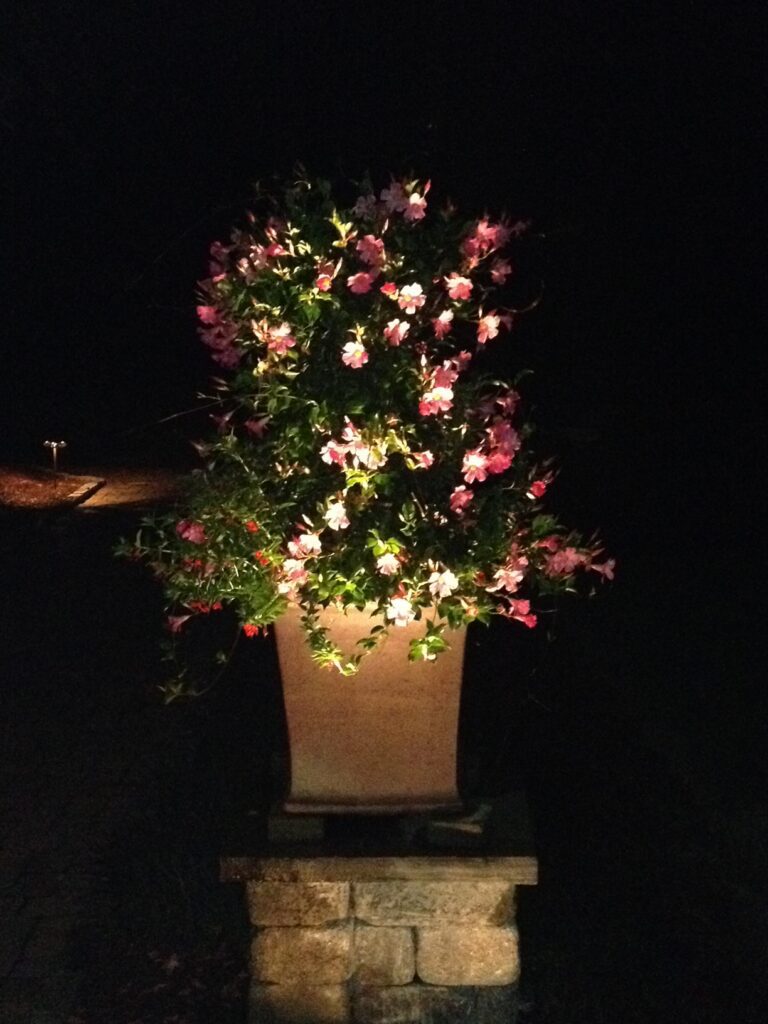
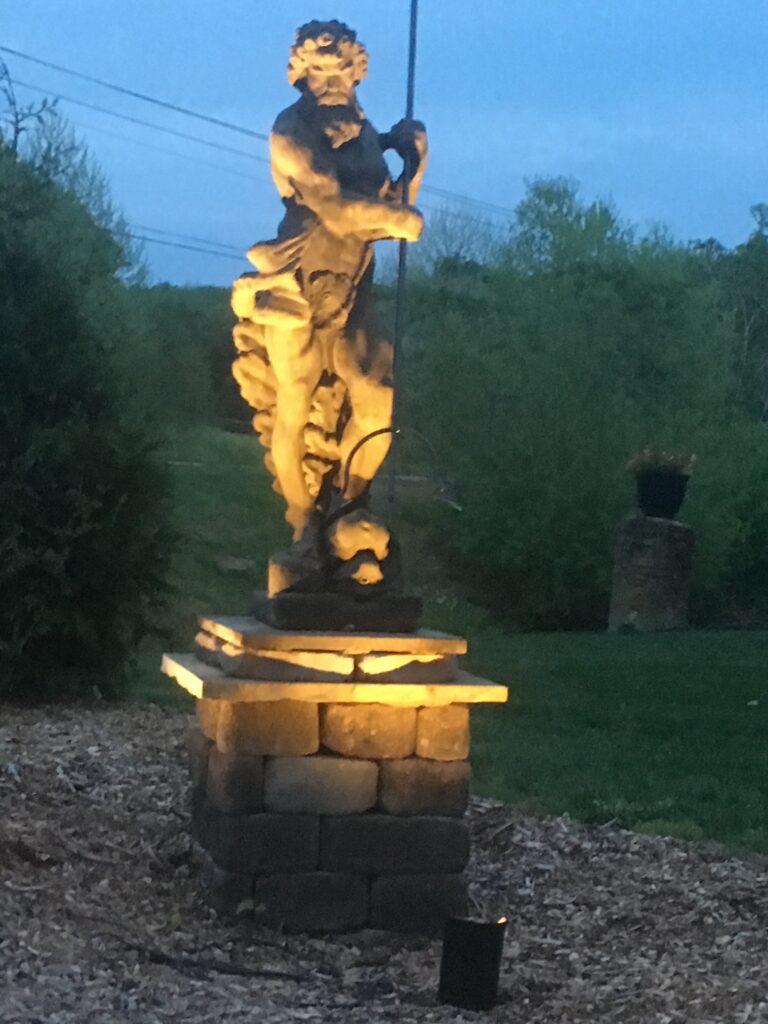
The importance of structure ties in with the walkway and the pedestals bring architectural appeal and definition to the Landscaping. The Urns with Ferns and Seasonal colors showcase and ties all the architectural aspects together! Even in the winter the Urn’s make a Statement with Landscape Lights illuminating them!
In 2004 we constructed a Garden at the Bloom and Garden Show Showcased with Pavers and Stone Columns and Stone Planters with Copper Obelisk and Landscape Lights for which we won the Gold Award for!
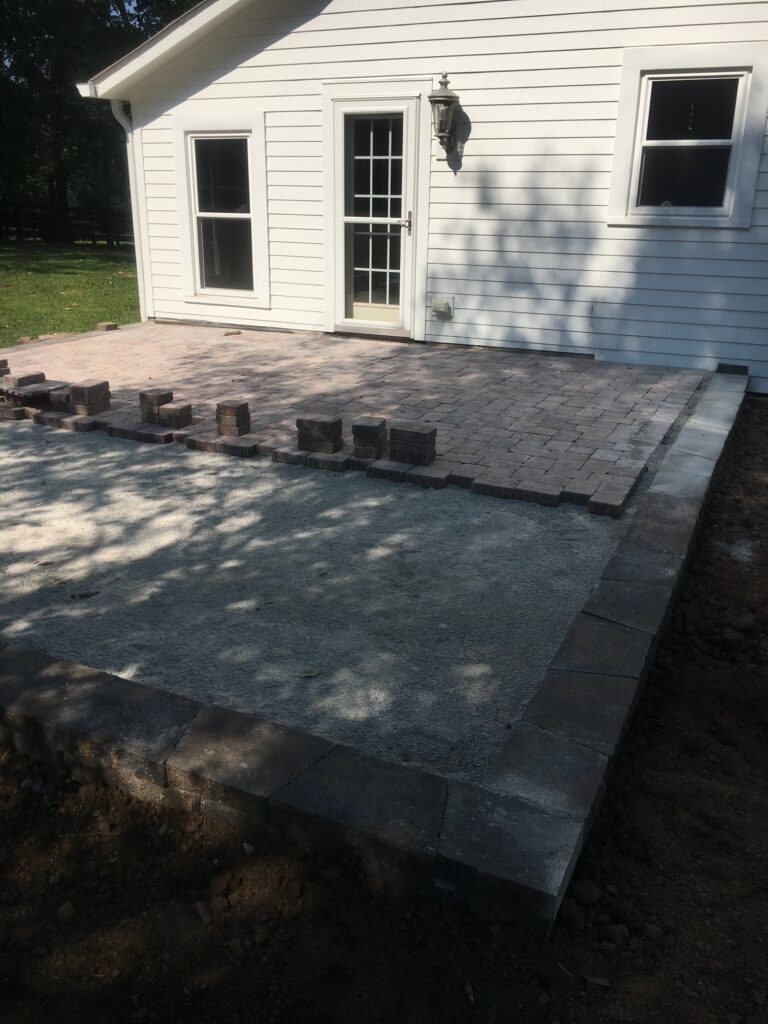
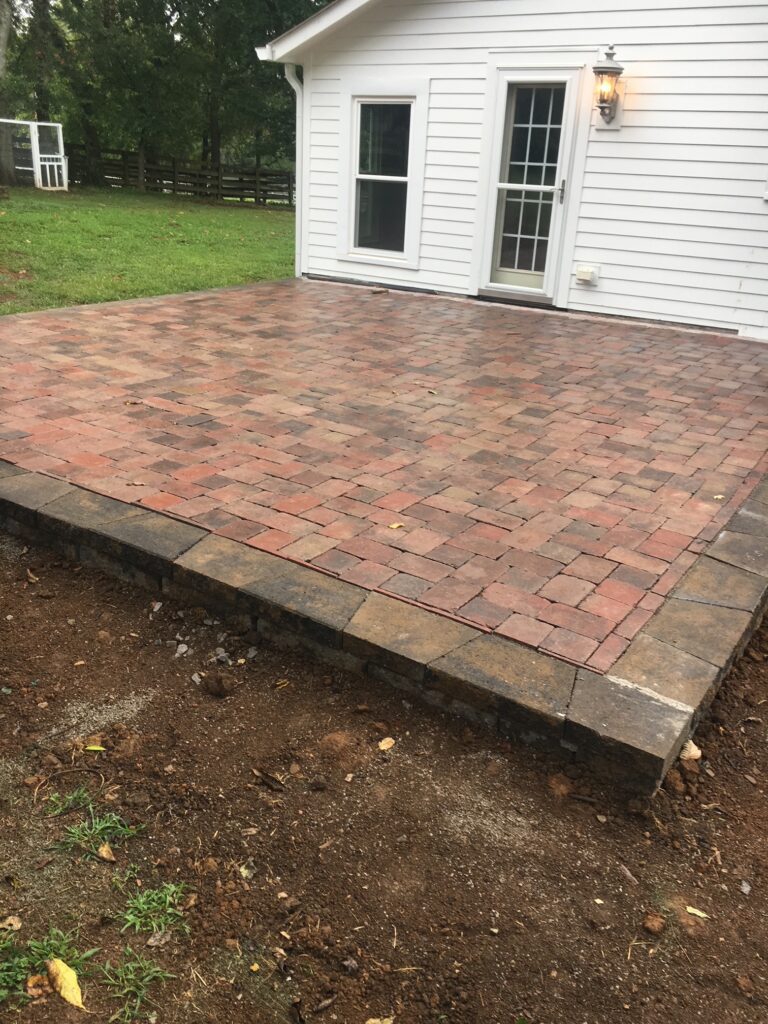
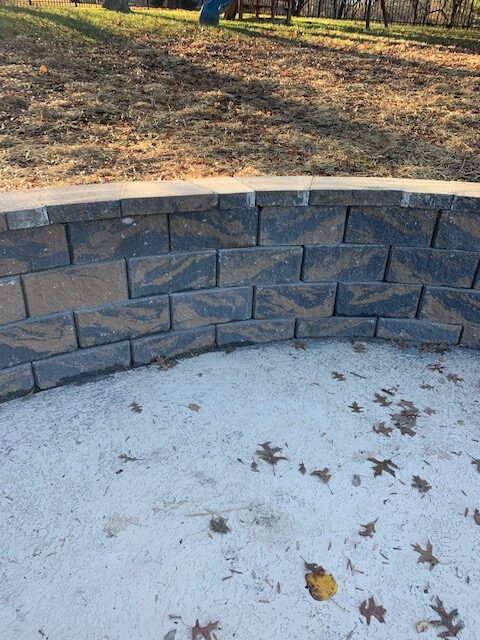
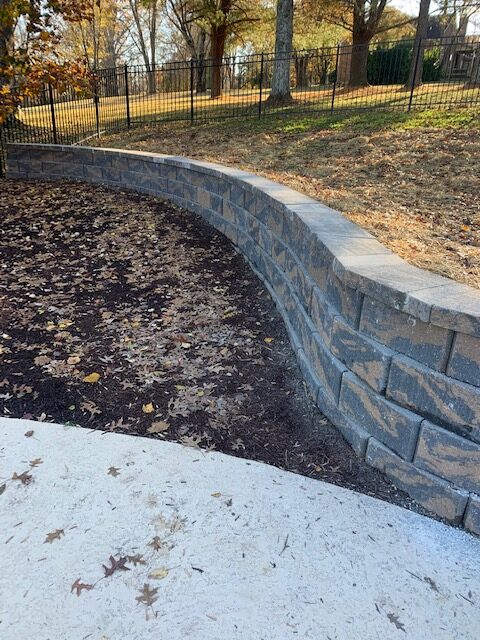
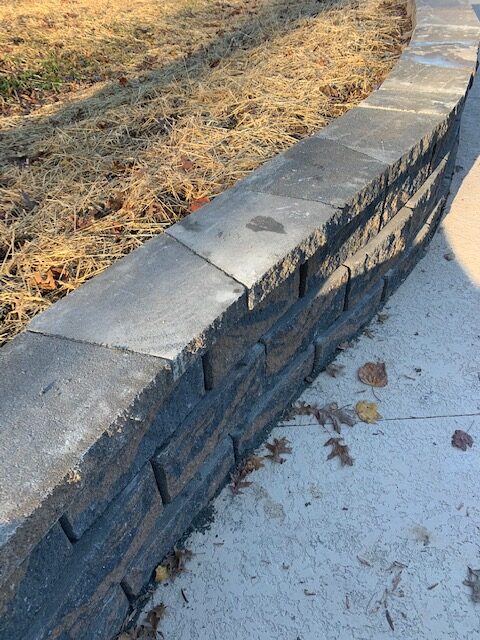
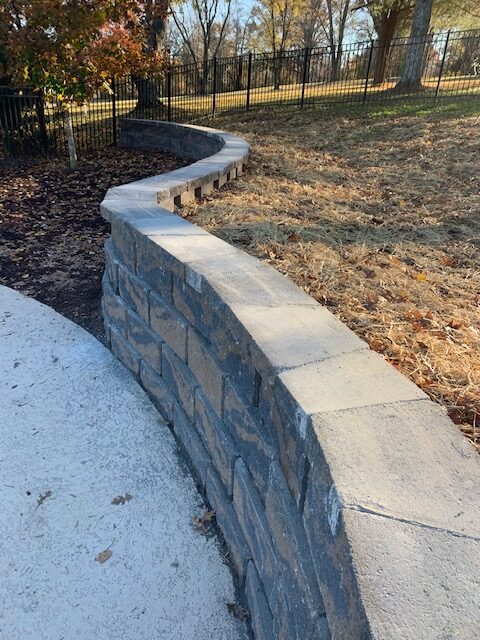
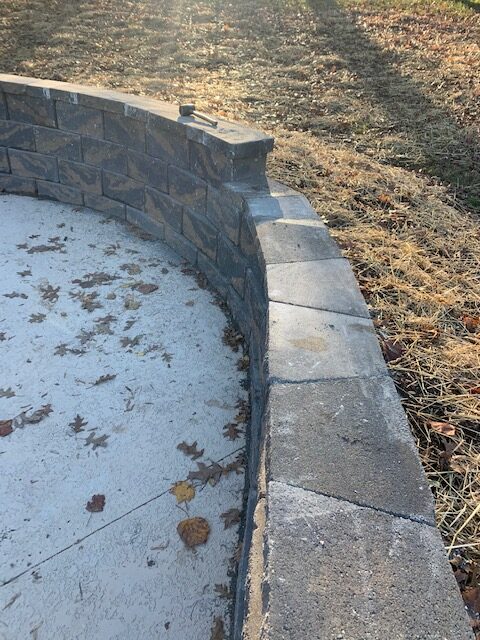
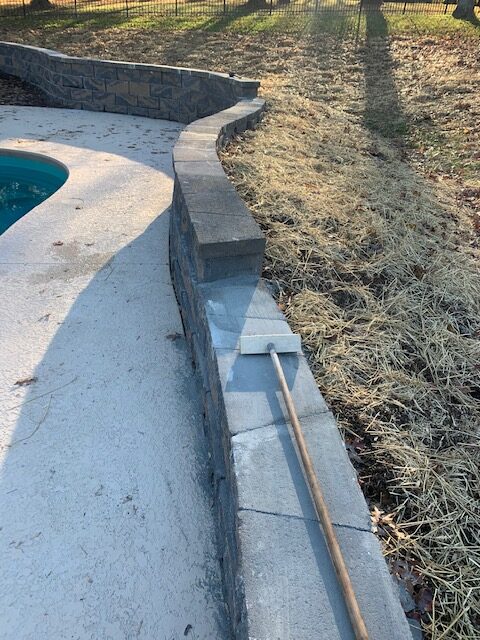
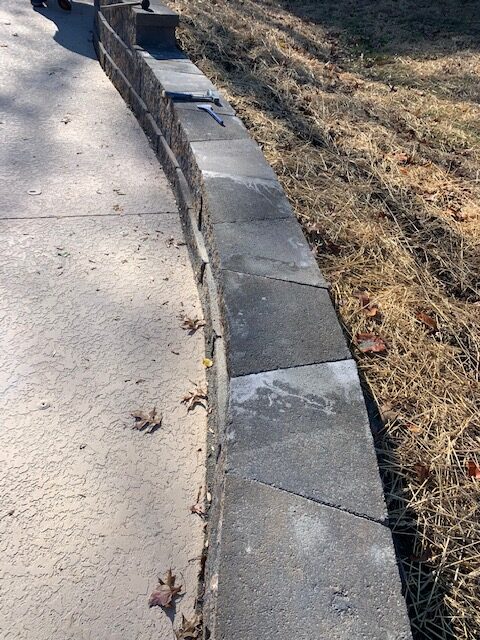
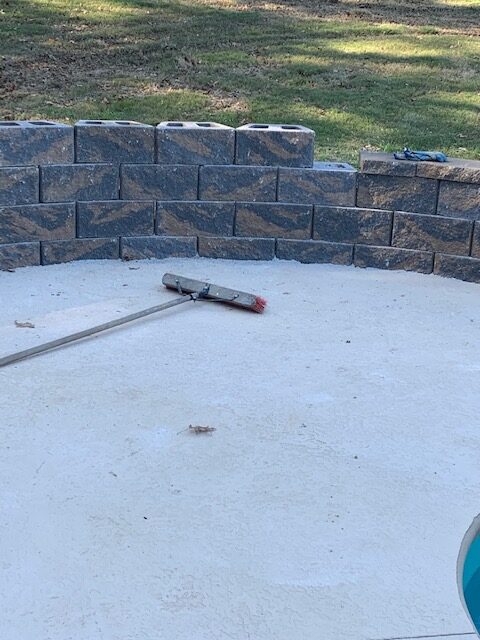
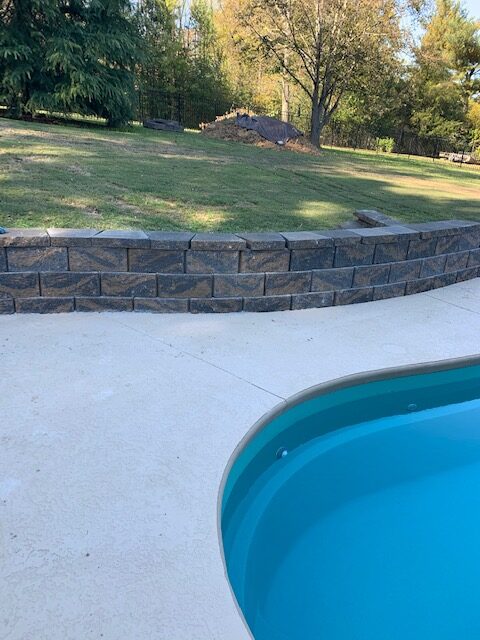
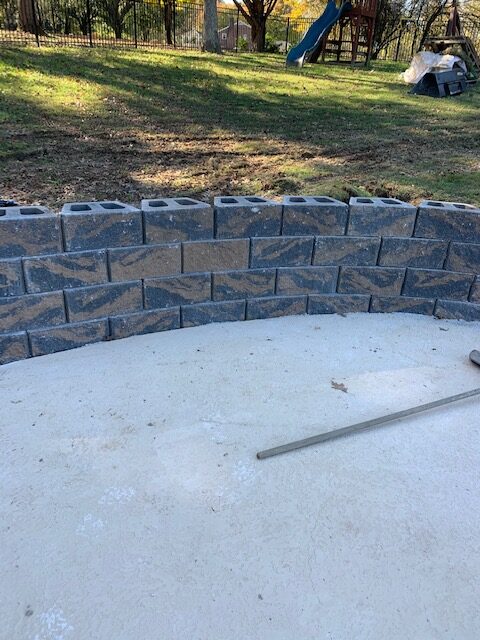
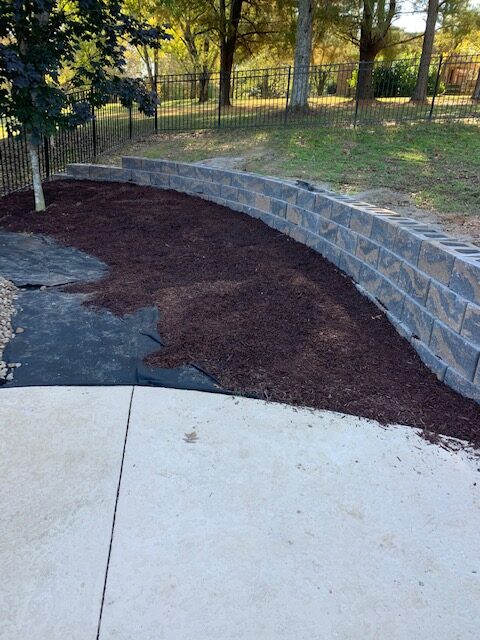
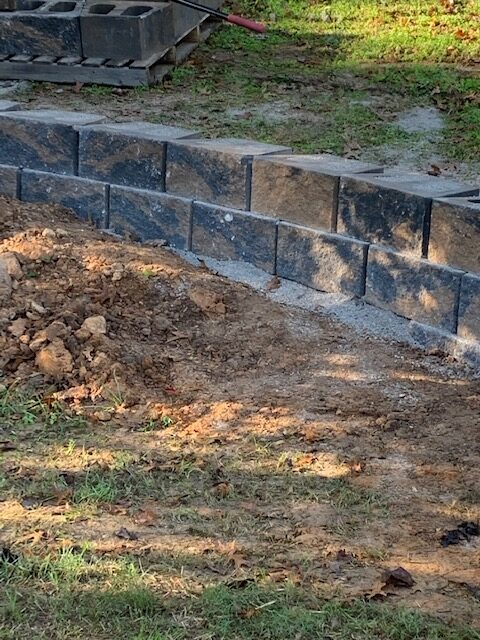
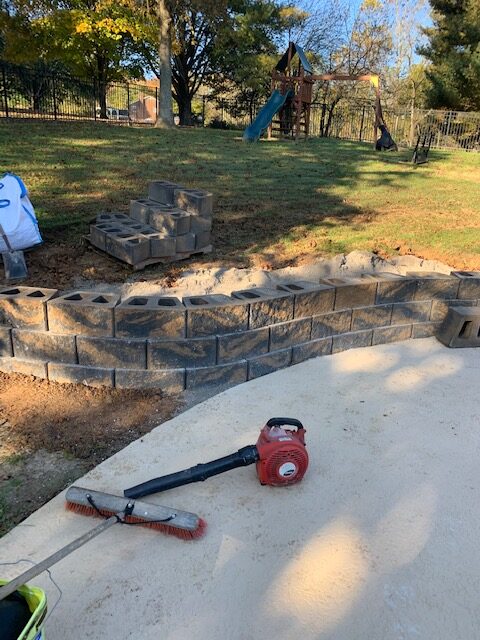
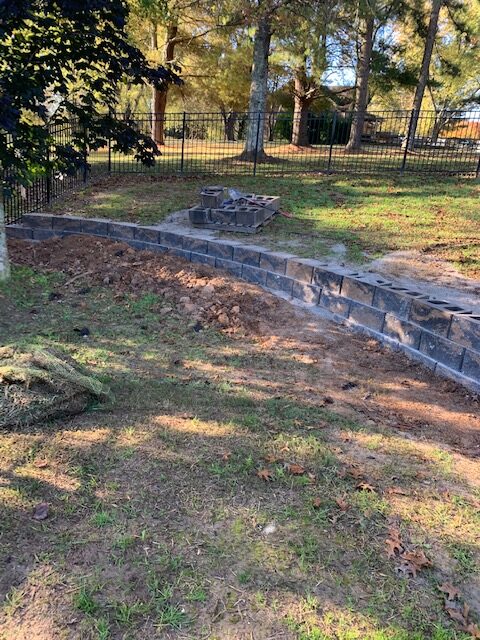
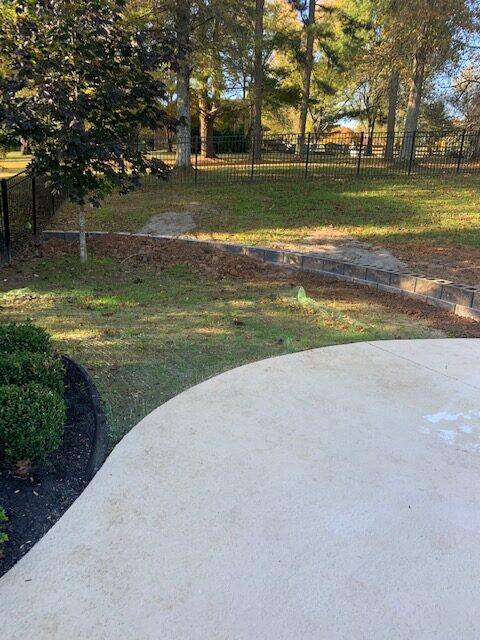
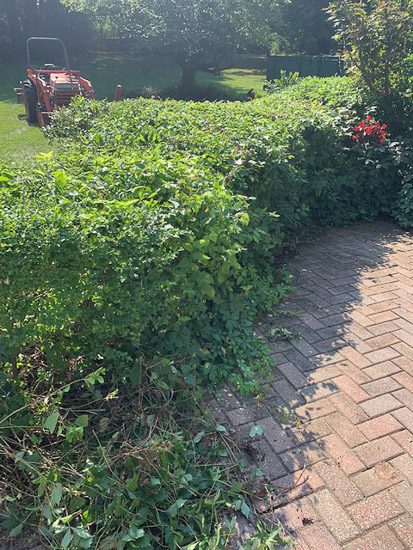
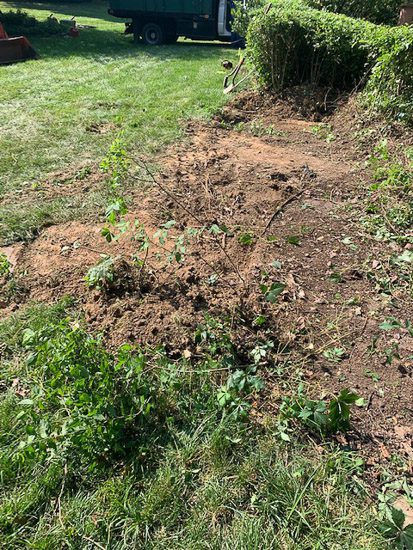
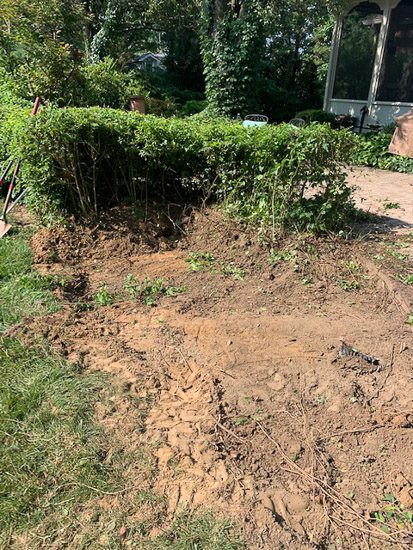
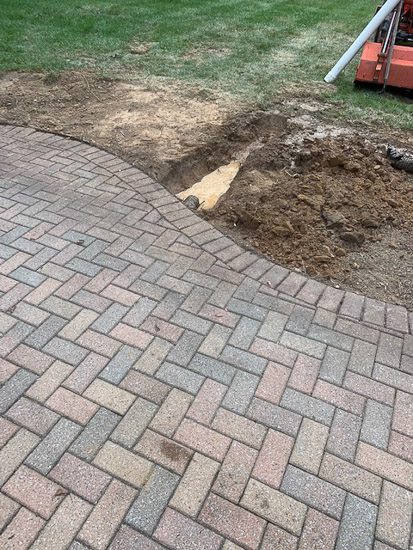
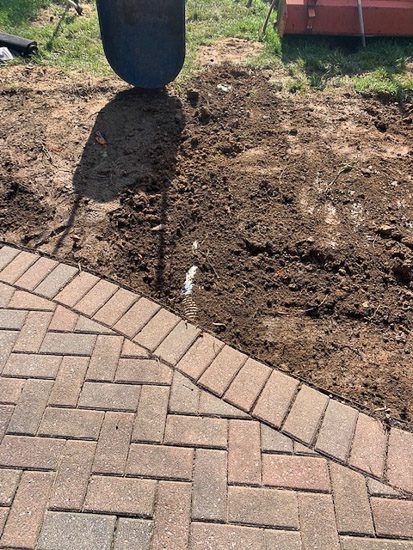
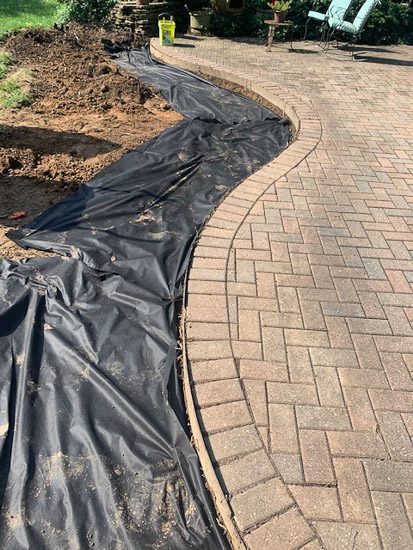
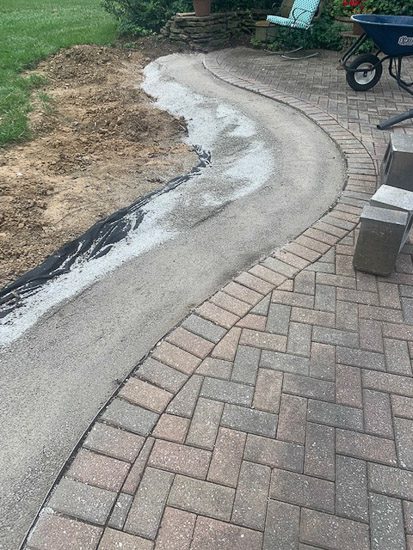
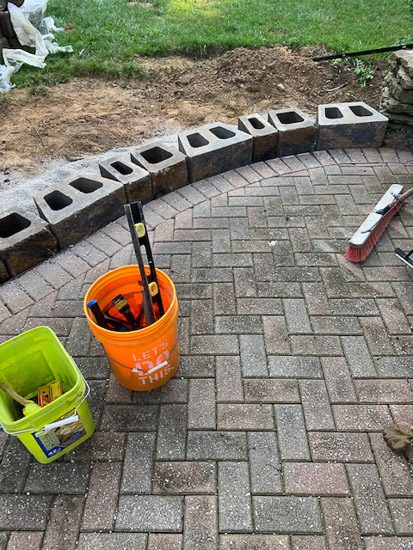
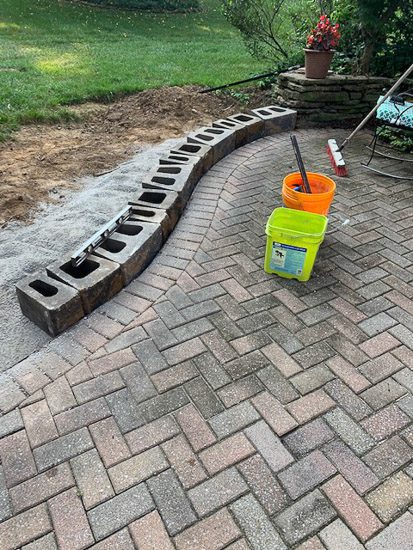
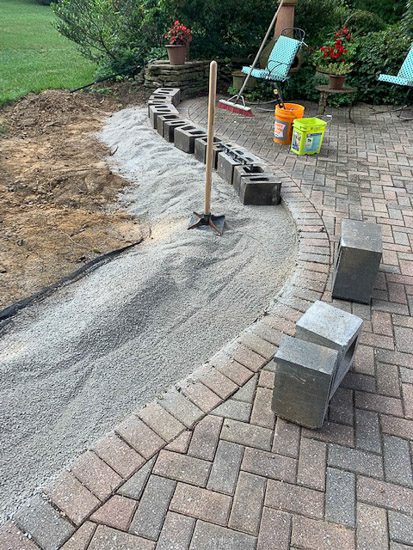
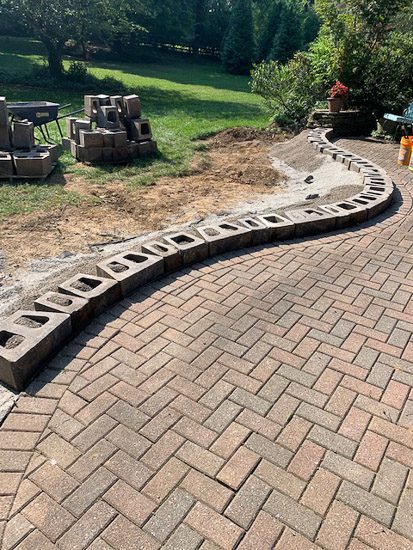
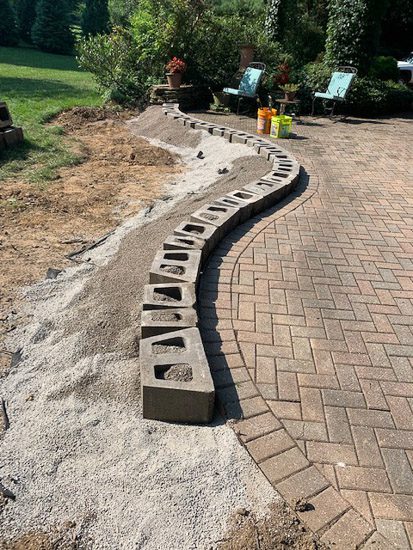
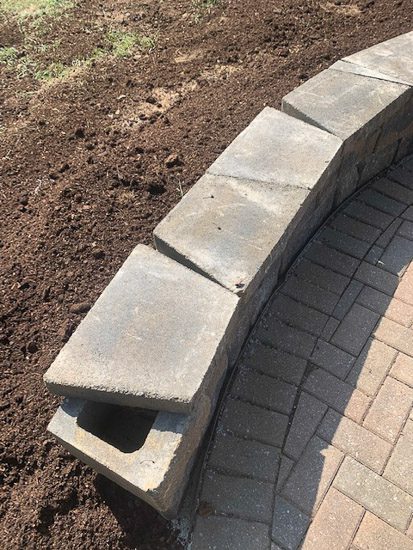
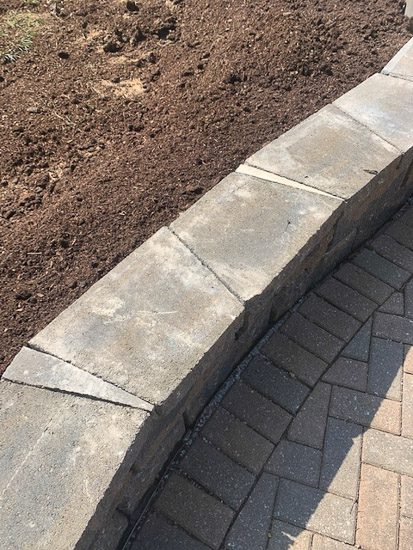
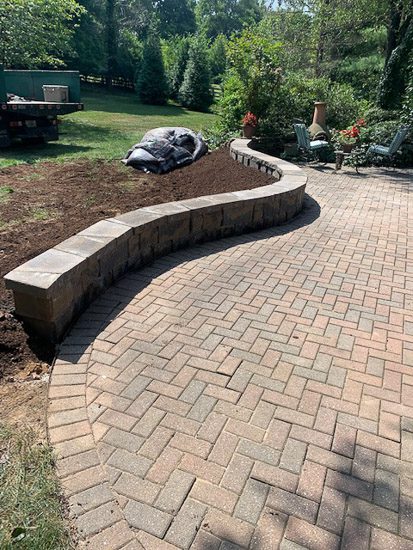
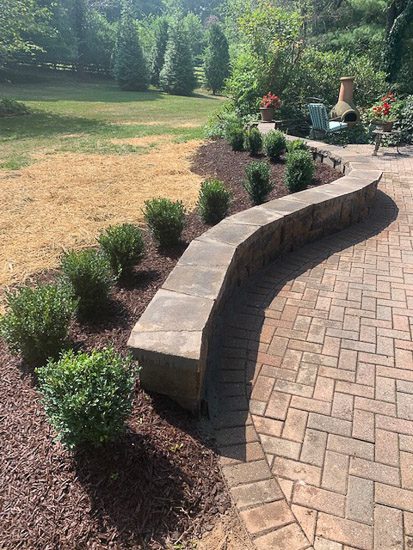
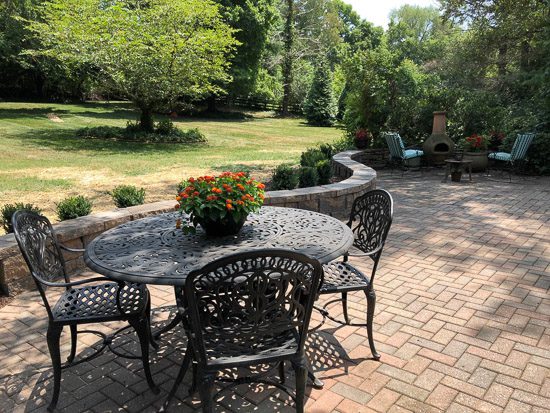
First thing we had to do was remove the Privet hedge along the Patio without tearing up the pavers. We slowly removed them carefully with my Kubota tractor front end loader and not a Skid steer which would have torn the yard up , as we removed the hedge along the patio we encountered a 4 inch drain pipe that came from under the patio. This drain pipe was full of roots and shingle debris from over the years. The homeowner and i discussed what to do with this situation and best remedy the problem . We had a sitting wall to build on top of a ADS perforated pipe ,so we cut the black pipe as far as we could and used a coupling to attach schedule 40 4 inch pipe and run it out to an emitter we installed to drain the water away from the new sitting wall and Boxwood bed. Then we installed landscape fabric and brought in Block Fines and compacted the base before installing the wall material.
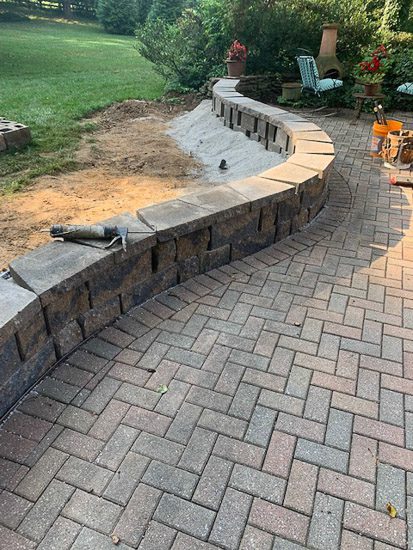
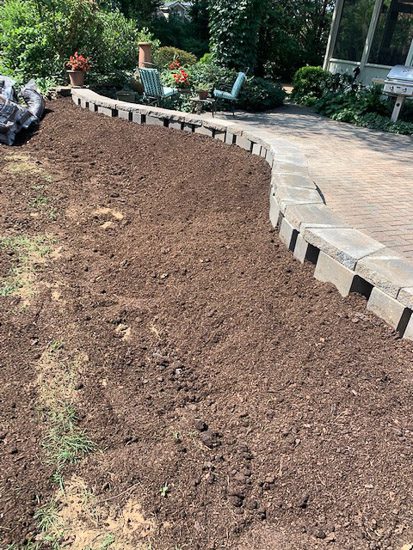
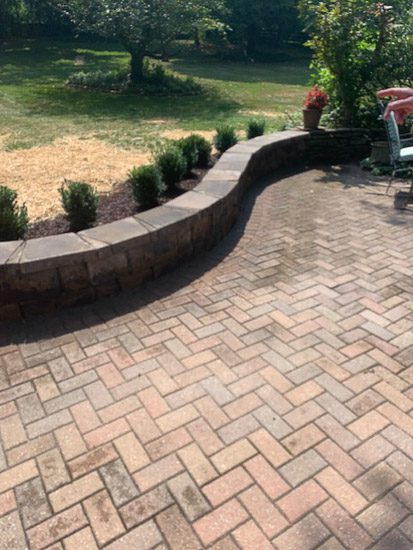
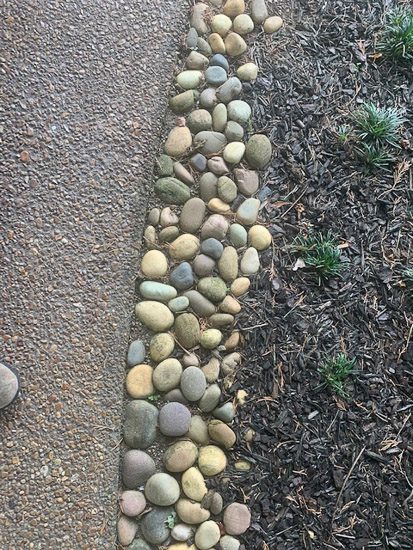
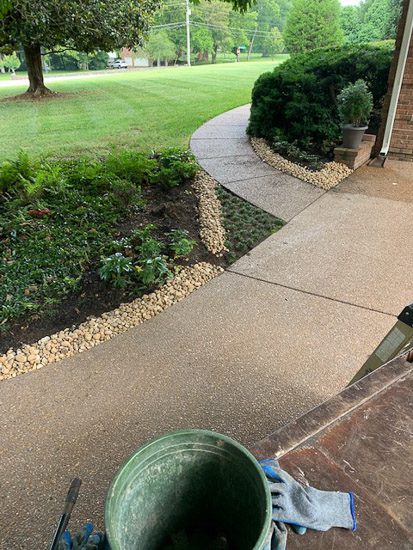
The wall material was a 3 piece sectional material Large Medium and small . We removed the bottom lips on each course and the first course was installed perfectly level and was positioned next to the patio. The material was inches thick and we installed 2 course with a Capstone on top . We applied a concrete adhesive on each course including the Caps . Because the wall had a curve and had to be next to the Patio the Capstones had to be Cut and measured precise to fit using a circular saw with a masonry carbide blade . This took some time and had to be perfect . The finishing touch was a bed with Boxwoods planted to soften and enhance the beauty of the Sitting Wall. We brought in my Special blend of Compost called whistling Cove Compost aka scott’s gold . Name change to not benefit scotts brand . Then we applied Treflan and mulch . Also , we applied a material called Next Gell Granite Color between patio and Sitting Wall that acts as a mortar joint finishing the aesthetic appearance. At last Job finished and a Very Happy Client. IOn the front of the house was a area that had erosion problems and we laid a 2-3 inch east tennessee rock to fix that issue and installed a brown pebble dry creek bed in the back yard. Our client had a rotten rail on her deck and wood cap so knowing we could take care of that we replaced it with a treated board that i sanded on each side and attached with deck screws not nails. The client repainted new wood and was extremely happy.